- Download and install the software.
- It will scan your computer for problems.
- The tool will then fix the issues that were found.
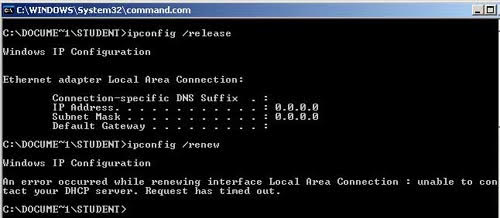
An error occurred while updating the Ethernet interface. You cannot contact your DHCP server. If you try to run the following command: ipconfig / refresh, you may also get an error which causes you to not be able to contact your DHCP server. This means that your network card will not be able to contact the DHCP server to get the new lease which will be used to get the new IP address.
Keep reading and you will get different methods to solve your problem.
Table of Contents:
Check your network card settings
Step 1: Open the “Network Settings” or “Internet Connection” window using the following method: Open the “Run” dialog box while pressing the Windows logo key + the R keys. Then type ncpa.cpl and click OK.
Step 2. Double-click the active network adapter, click “Properties” and find “Internet Protocol Version 4 (TCP / IPv4)” in the list, select it and click “Properties”.
Step 3: Make sure that “Obtain an IP address automatically” and “Obtain DNS server address automatically” are selected.
Step 4: Click the “Advanced” button and make sure DHCP is enabled.
Step 5: Repeat the steps above if you also or exclusively use IPv6.
Update or restore the network driver
Depending on the driver that caused the error on your computer, you may want to try updating and restoring the network driver.
Update the network driver

Step 1: Right-click the Start menu and select Device Manager to open it.
Step 2: Click to expand Network Cards. All network adapters installed on your computer are displayed.
Step 3: Right-click the network adapter you want to update and select “Update Driver”.
Step 4: Select “Automatically check for driver updates”.
Step 5: Follow the instructions to complete the driver update.
Restart your computer and see if the “You cannot contact your DHCP server” problem has disappeared.
Rollback the network driver

If the problem occurs after a driver update, you will need to reset the driver until a new secure driver is released.
Step 1: Locate all network adapters by following the above instructions. Right-click on the network adapter you want to reset and select “Properties”.
Step 2: Go to the “Driver” tab and click “Reset Driver”.
Step 3: Click OK, and then follow the instructions to continue the process.
Restart your computer and check to see if the problem of not being able to contact your DHCP server persists on the command line.
If you have an older version of the driver installed on your computer, you will need to update it to resolve the problem.
Troubleshooting Windows Networking or Network Troubleshooting
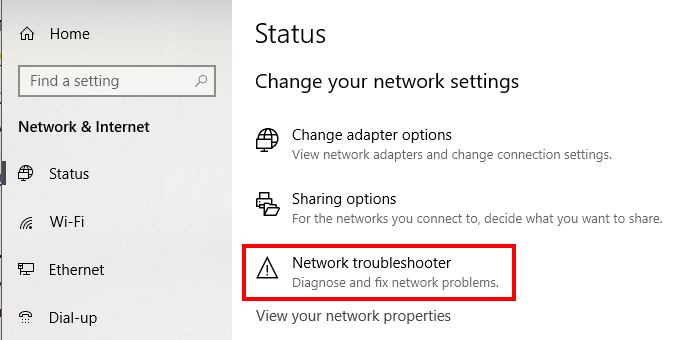
Step 1: Right-click the network icon in the Windows notification area and select Troubleshooting from the context menu.
Step 2: Windows will check the network and check for problems. After checking, you will see that DHCP is not enabled for your local network connection.
Step 3: If yes, select this repair as administrator and follow the instructions.
Step 4: Windows will fix the problem and enable DHCP for the adapter so that Internet and network access is restored using DHCP.
Release and Renew your IP address

When you are connected to a network, your computer is usually assigned an IP address by your router for a limited time. Each of these so-called intellectual property leases has a maximum duration of 24 hours.
In most cases, the network router assigns the same IP address multiple times, but sometimes conflicts can occur. The IP address may have been assigned to another device by mistake, or your network adapter may have problems completing the IP lease renewal process due to misconfiguration or hardware issues.
If your Windows computer is experiencing the “Failed to renew IP address” error and the Windows network diagnostic tool cannot resolve the problem, you should try using the ipconfig tool to automatically release and renew your lease. IP Address.
First, open a Windows PowerShell window. To do this, right-click the Windows Start menu button on the taskbar and select Windows PowerShell (Admin). You can also do this from the old Windows command line.
- If you see the command line in your menu, see the Previous article on how to switch menu items to PowerShell.
- Type ipconfig / all to get a list of details of the current network configuration.
- Type ipconfig / release to free your IP address. This will rid your network adapters of their assigned IP addresses.
- After releasing the network adapters, type ipconfg / Renew to assign a new IP address lease.
APPROVED: To fix Windows errors, click here.