- Download and install the software.
- It will scan your computer for problems.
- The tool will then fix the issues that were found.
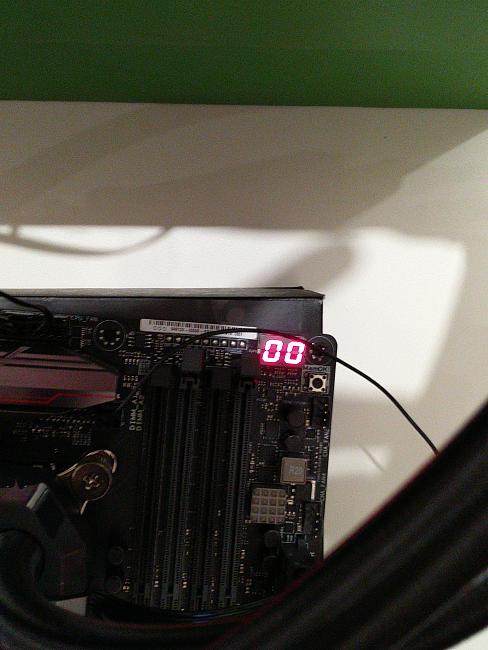
Some PC users using an ASUS motherboard see error code 00 Q on their motherboard when trying to start their computer. Some users who have encountered this problem report that there is no signal on the screen when they encounter this error.
Table of Contents:
CMOS Battery Reset
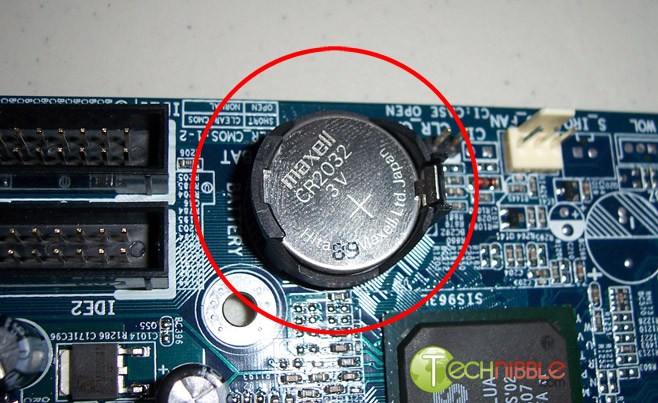
In fact, one of the most common causes that can cause the 00 Q error code is the inconsistency supported by the complementary metal-oxide semiconductor (CMOS) battery. In most cases, this ASUS Q error is caused by corrupted data that is stored between downloads and requires deletion.
Updated: April 2025
This tool is highly recommended to help you fix your error. Plus, this tool offers protection against file loss, malware, and hardware failures, and optimizes your device for maximum performance. If you already have a problem with your computer, this software can help you fix it and prevent other problems from recurring:
- Step 1 : Install the PC Repair and Optimizer Tool. (Windows 10, 8, 7, XP, Vista).
- Step 2 : Click Start Scan to determine what problems you are experiencing with your computer.
- Step 3 : Click Repair Allto resolve all problems.

- First, turn off your computer and disconnect it from the power source it is currently plugged into.
- Then remove the side case from your PC and put on an anti-static strap before touching any internal components.
- Note. A wrist strap is optional, but recommended because it grounds you to the frame and eliminates the risk of static electricity short circuits by balancing the electrical energy flowing through your PC components.
- After making sure you’ve taken the proper safety precautions, take a look at your ASUS motherboard and look for the CMOS battery. It’s easy to spot because it’s the same type of battery you’ll find in an analog clock.
- If you see it, use your fingernail or a non-conductive object to pull it out of the socket.
- After removing the battery, wait at least 10 seconds to allow the motherboard time to discharge the power capacitors and “forget” the information previously stored in the CMOS battery.
- Then insert the CMOS battery back into the slot and close the side cover before reconnecting the computer to a power source.
- Run the computer in normal mode and see if the problem is resolved.
Reset UEFI
If removing the CMOS battery was not correct, try resetting your PC’s UEFI settings. UEFI or Unified Extensible Firmware interface settings are available when you start your PC. A Q-code 00 error can occur due to inconsistencies in these settings. Therefore, resetting the UEFI settings to their default values may help in your case to resolve the problem immediately.
To reset the UEFI settings, you must first go to the recovery menu.
- Shut down the computer while it is booting. Do this three times in a row. And then let the computer start up. It will be changed automatically in recovery mode.
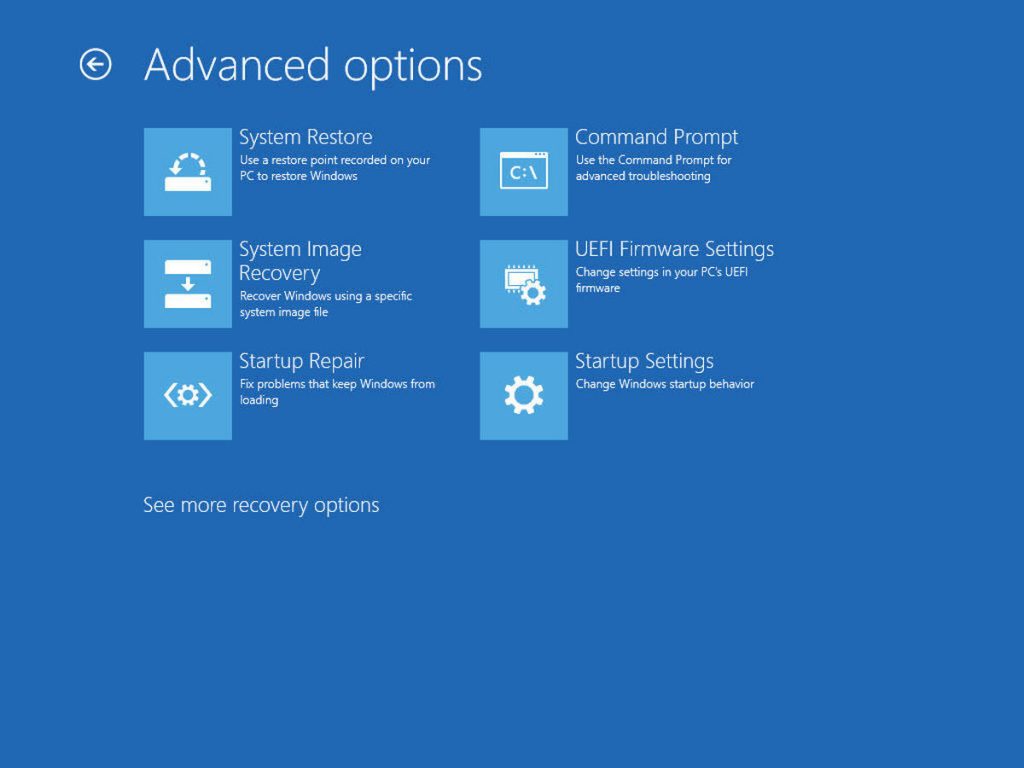
- If you are in recovery mode, go to Troubleshooting> Advanced> UEFI Firmware Settings.
- Then on the next page, click the small restart button.
- Allow your computer to restart automatically. After the restart, the UEFI settings will appear on your screen.
- In the UEFI settings menu, look for the default recovery option. When you find it, select it and confirm your action.
After restoring the default settings, check the UEFI settings menu to see if you get the same error again or not. If it happens again, try the following possible solution.
Reset BIOS

To reset the BIOS, you need to enter the BIOS settings menu.
- When you turn on your computer, press the boot button on your keyboard. These are usually the F1, F2, F8, F12, or Delete keys. Different manufacturers set up different keys as startup keys.
- Once you press the right start button, the BIOS settings menu will appear.
- Here, find the default store configuration option. You may even see this option as a factory reset or factory reset.
- Select this option and confirm your action.
After resetting the BIOS settings, turn the computer back on and see if the same error occurs again.
APPROVED: To fix Windows errors, click here.