Updated April 2025: Stop these error messages and fix common problems with this tool. Get it now at this link
NVIDIA outputs grayed out and listed as “Not Connected”? No need to worry, you are on the right troubleshooting article. A lot of Windows users report the exact same problem, but the most important thing is that you can resolve the problem quickly and easily.
Table of Contents:
What causes the “NVIDIA output not connected” message?
![]()
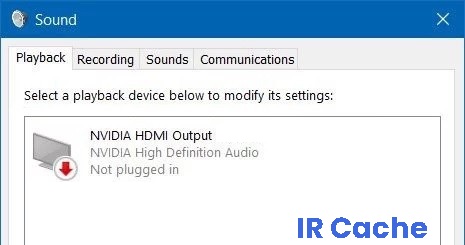
The problem stems from the fact that the NVIDIA audio output is listed as unconnected on the Playback tab of the Control Panel Sound settings. Also, users cannot enable audio for the HDMI output. There are several possible causes for this problem, from a corrupted driver to an outdated driver.
Below are the troubleshooting steps you need to take to solve this problem.
How to resolve the “NVIDIA output not plugged In” issue?
This tool is highly recommended to help you fix your error. Plus, this tool offers protection against file loss, malware, and hardware failures, and optimizes your device for maximum performance. If you already have a problem with your computer, this software can help you fix it and prevent other problems from recurring:
Updated: April 2025

Updating the NVIDIA graphics drivers
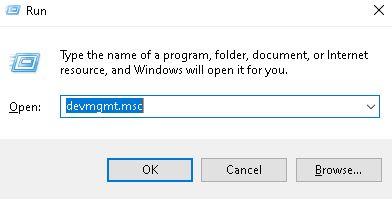
- Press the Windows +R key to open “Run”.
- Then type devmgmt.MSC and click OK.
- Go to the Display Adapter section, click on the graphics card and select Uninstall Device.
- Complete the uninstall process and visit the NVIDIA website.
- Enter your card and operating system information here and click Search.
- Check the list of available drivers, click on the name of your driver, and select Download.
- Save the file to your computer, open it, and install the driver.
- On the Installation Options screen, select Selective (Advanced) and click Next.
- Select the Perform a clean installation checkbox, click Next, and install the driver you want.
Enable the NVIDIA output device in the Control Panel
- Right-click on your desktop and select NVIDIA Control Panel.
- In the Display section, click the + button.
- Select Configure Digital Audio.
- Navigate under the name of your video card and look for HDMI.
- Right-click the volume icon in the lower right corner of the screen.
- Set the display to Large Icons, then click the Audio and Playback tab.
- On the Playback tab, right-click to select the checkboxes.
- Click on the new device and choose Set Default.
APPROVED: To fix Windows errors, click here.
Frequently Asked Questions
Why does it say that my Nvidia output is not connected?
If you didn't make the correct settings in the NVIDIA control panel, your HDMI port may not be configured for audio output.
How do I enable Nvidia output?
- In the NVIDIA Control Panel navigation tree, under Display, click Configure Digital Audio to open the appropriate page.
- Check the displays that you want to see as audio devices in the Windows audio settings.
- When finished, click Apply.
- Click Open Windows audio settings.
What is the Nvidia audio output?
The NVIDIA HD internal audio codec can only be used for output to an HDMI (or DisplayPort) display. It does not support analog audio. If you have a video card with a built-in NVIDIA HD audio codec, simply connect an HDMI audio cable from the video card to the HDTV and it will output both video and audio.