Updated April 2025: Stop these error messages and fix common problems with this tool. Get it now at this link

If you get the error 0x800700DF “File size exceeds the limit and cannot be saved” when copying or moving files on a Windows 11 or Windows 10 computer to another drive or external device, here are some solutions that can help you solve the problem.
Even if you have more than enough space on your target drive, this error can still occur. Here’s what you can do in such situations.
Table of Contents:
What are the causes of error 0x800700DF?
- Web Client service is disabled: The problem is caused by the fact that the required service is disabled (web client).
- The file system is not able to support this file transfer: The error occurs because of the FAT32 file system limitation.
How to troubleshoot error 0x800700DF?
This tool is highly recommended to help you fix your error. Plus, this tool offers protection against file loss, malware, and hardware failures, and optimizes your device for maximum performance. If you already have a problem with your computer, this software can help you fix it and prevent other problems from recurring:
Updated: April 2025

Activate the web client service
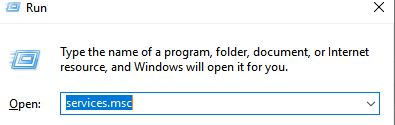
- Open the “Run” dialog box by pressing the Windows + R keys at the same time.
- Type “services.MSC” in the dialog box text box and press Enter. The Services window will open.
- In the window that has just opened, locate the web client and right-click it.
- Select Properties from the list of available options.
- In the Properties window, click the General tab and change the startup type to Manual.
- Then click Start and OK to save your changes.
Set a limit on the size of the uploaded file
- Log in to SharePoint Admin Central and navigate to the path shown below.
- Central Administration/Application Management/Web Application Management
- Select the applications you want to change and click General Settings.
- Then change the maximum download size to 2047 MB.
Change the file system on your memory
- Launch File Explorer and navigate to the folder with the problem.
- Right-click the folder and select Format from the list of available options.
- In the window that opens, change the file system to NTFS and the selection unit size to the standard selection size.
- Name the reformatted volume and uncheck the Quick Format checkbox.
- Finally, click the Start button and wait for the process to complete. Depending on the size of the disk, this process may take one to two hours.
- Reboot your computer.
APPROVED: To fix Windows errors, click here.
Frequently Asked Questions
What does “File exceeds size limit” mean?
You are getting this error message because in Outlook 2013 and later versions, the standard attachment size for Internet email accounts is 20 megabytes (20480 KB). This limit prevents your computer from constantly trying to download very large attachments that exceed the limits of most Internet service providers.
How to fix error 0x800700DF?
- Press Windows + R to open the 'Run' dialog box.
- Type 'Regedit' and click 'OK' to open the 'Windows Registry Editor'.
- Now go to the HKEY_LOCAL_MACHINE section.
- Click on 'Services' and you will see the 'WebClient' option.
- Open 'Settings'.
How to fix the max file size exceeded?
- Reduce the size of the document.
- Make multiple deposits.