- Download and install the software.
- It will scan your computer for problems.
- The tool will then fix the issues that were found.
The new version of the Windows operating system has been released worldwide with numerous bugs and flaws. This is especially noticeable in newer operating systems, especially in drivers that are still in the testing phase. Recently, many users have been complaining that the Realtek audio console does not improve the sound quality on Windows PCs, such as virtualizing headphones, balancing the volume, etc. for headphones, speakers, and other peripherals. So, today we give you a great guide to help you troubleshoot the Realtek audio console not working on your Windows PC.
Table of Contents:
What is the cause of the “Realtek audio console not working” problem
Realtek Audio Manager should give you plenty of options to change your audio settings. However, your efforts will be in vain if you cannot open them at all. Drivers are the most common cause of this problem. Your Realtek Audio Manager may work if the drivers are not installed or are corrupted.
In some cases, this error may be caused by a driver update or a Windows update. If the problem occurred after a driver update, the problem may be related to the latest driver version. Often the latest version has the type of error that causes a similar problem.
How to fix the ‘Realtek audio console is not working’ error
Launch the SFC scanner
A system file checker is a handy tool that can be used to scan for and repair corrupt files on your Windows 10 computer.
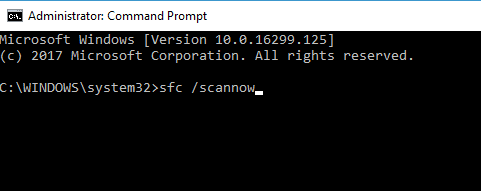
- To use the SFC scan, open the Command Prompt as an administrator.
- In the Command Prompt, type “sfc /scannow” and press Enter.
- The scan will take some time to complete, and you may see some on-screen activity as it progresses.
- Once the scan is finished, you’ll see a message indicating whether or not any problems were found.
- If no problems were found, then you can rest assured that your system is healthy.
- However, if problems were found, then you’ll need to take additional steps to fix them.
- For more information on how to use the SFC scan, consult the Windows help documentation.
Updated: April 2025
This tool is highly recommended to help you fix your error. Plus, this tool offers protection against file loss, malware, and hardware failures, and optimizes your device for maximum performance. If you already have a problem with your computer, this software can help you fix it and prevent other problems from recurring:
- Step 1 : Install the PC Repair and Optimizer Tool. (Windows 10, 8, 7, XP, Vista).
- Step 2 : Click Start Scan to determine what problems you are experiencing with your computer.
- Step 3 : Click Repair Allto resolve all problems.

Perform a DISM check
The DISM tool is a powerful utility that can be used to repair or update Windows 10.
- Open the Command Prompt as an administrator. You can do this by searching for “Command Prompt” in the Start menu, and then right-clicking on the result and selecting “Run as administrator.”
- Type DISM.exe /Online /Cleanup-image /Restorehealth and press Enter. This will scan your system for errors and attempt to fix them.
- Wait for the process to complete. This can take anywhere from a few minutes to a couple of hours, depending on the severity of the errors.
- Once the process is finished, type Exit and press Enter to close the Command Prompt window.
- Restart your computer and check to see if the issue has been resolved. If not, you can try running the DISM tool again with the /ScanHealth switch instead of /Restorehealth. This will perform a more thorough scan of your system, but it will also take longer to complete.
Install all pending Windows updates
Updating your Windows 10 computer is a simple process that can usually be completed in just a few minutes. Here’s a step-by-step guide to updating your Windows 10 computer:
- Click on the Start button, then select Settings.
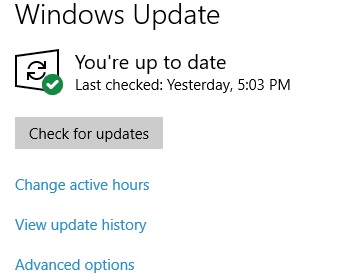
- In the Settings window, click on Update & Security.
- In the Update & Security window, click on Check for Updates.
- If any updates are available, they will be downloaded and installed automatically.
- Once the updates have been installed, you will be prompted to restart your computer. Simply follow the instructions on the screen to complete the restart process.
And that’s all there is to it! By following these simple steps, you can ensure that your Windows 10 computer is always up-to-date with the latest security patches and software improvements.
Uninstall and reinstall the Realtek audio driver
Uninstall the audio driver:
- To uninstall the Realtek audio driver, go to the Control Panel and select “Add or Remove Programs.”
- Find the Realtek audio driver in the list of programs and click “Remove.”
- Follow the prompts to complete the uninstallation process.
Reinstall the audio driver:
- To reinstall the Realtek audio driver, go to the Realtek website and download the latest driver for your Windows 10 computer.
- Save the file to your desktop and double-click it to run the installer.
- Follow the prompts to install the Realtek audio driver on your computer.
- Restart your computer for the changes to take effect.
- You should now be able to hear sound from your speakers and headphones again.
This process can vary depending on which version of Windows you are using, but these basic steps should get you started in uninstalling and reinstalling your Realtek audio driver on Windows 10
Troubleshoot hardware and peripherals
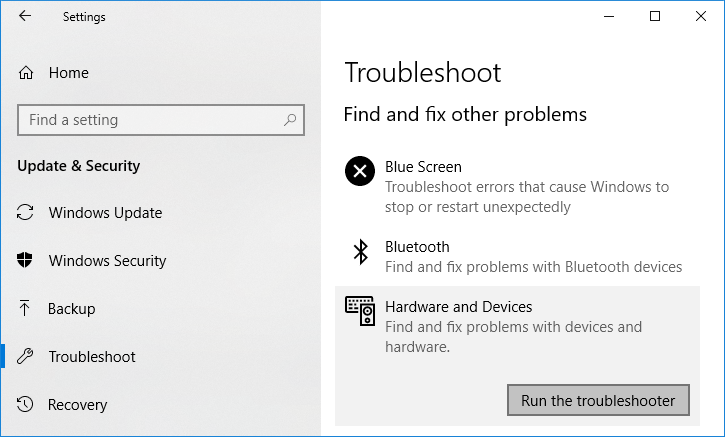
Windows 10 offers a handy tool for diagnosing and troubleshooting hardware and device problems.
- To access it, simply search for “hardware and devices” in the Start menu.
- Once the troubleshooter opens, click “Advanced” and then check the box next to “Apply repairs automatically.”
- Finally, click “Run as administrator.” With this option enabled, the troubleshooter will attempt to fix any problems it finds automatically.
- If it is unable to do so, it will provide a list of recommended actions that can be taken to resolve the issue.
In most cases, following these steps will be enough to get your hardware and devices up and running again.
APPROVED: To fix Windows errors, click here.
Frequently Asked Questions
How do I enable the Realtek console?
- Right-click on the taskbar and select Task Manager.
- Then select the Start tab.
- Then right click on Realtek HD Audio Manager and select Enable if disabled.
- Close the Task Manager and restart Windows.
How do I reset my Realtek console?
- Right-click the "Realtek High Definition Audio" entry in the Playback pane. Select "Properties.
- Click the "Drivers" tab. Click on "Uninstall" and confirm by clicking on the checkbox and selecting "OK".
- Restart your computer after the driver uninstall is complete.
How to repair the 'Realtek audio console not working' issue?
- Launch the SFC scanner.
- Perform a DISM check.
- Install all pending Windows updates.
- Uninstall and reinstall the Realtek audio driver.
- Troubleshoot hardware and peripherals.