- Download and install the software.
- It will scan your computer for problems.
- The tool will then fix the issues that were found.
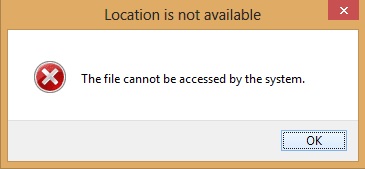
The folder access denied error occurs when you try to open a folder that does not belong to you. This issue might occur because the folder contains sensitive information such as personal files, financial records, or important documents. You might want to delete the contents of the folder to prevent further damage. However, if you do not have sufficient privileges, you will see a warning prompt asking you to provide administrative credentials. In most cases, the folder access denied error is caused by a lack of administrator rights.
As a rule, file access denial is primarily due to insufficient access rights of a virus or administrator.
A computer virus can be caused by connecting to an unsecured network or using a contaminated external hard drive. If the virus is hidden in specific folders, it can violate administrator rights and cause the folder to be denied access. Therefore, if you come across a folder that is not accessible, you can check if a virus is a cause. In general, you can use standard antivirus software to solve this problem.
Many computer users do not use an administrator account but log in with a guest account, which prevents the system from accessing some essential files. If this problem occurs, you need to check the user rights. Alternatively, the problem may be due to the fact that the administrator has not added permissions for the folder.
Table of Contents:
Install the latest Windows update
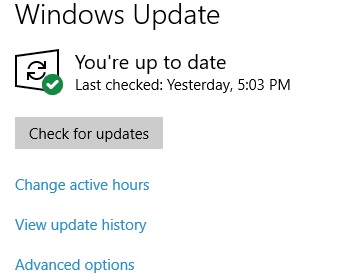
If you are having issues with Windows 10 or 8/81, it could be because of outdated software. In this case, we suggest updating your operating system to the latest version. You can do this manually or use one of our methods.
Step 1: Download Windows 10 ISO file
You can download the Windows 10 ISO file from Microsoft directly. If you don’t know how to do that, please read our guide here.
Step 2: Burn the ISO image onto a CD or DVD
Burn the ISO image file into a CD or DVD. Then insert the disc into your computer and boot from it.
Step 3: Restart your computer
After rebooting, you’ll be able to install Windows 10 without encountering any errors.
Updated: April 2025
This tool is highly recommended to help you fix your error. Plus, this tool offers protection against file loss, malware, and hardware failures, and optimizes your device for maximum performance. If you already have a problem with your computer, this software can help you fix it and prevent other problems from recurring:
- Step 1 : Install the PC Repair and Optimizer Tool. (Windows 10, 8, 7, XP, Vista).
- Step 2 : Click Start Scan to determine what problems you are experiencing with your computer.
- Step 3 : Click Repair Allto resolve all problems.

Turn off the services
Step 1: In the Windows Search Box, type “System Configuration.”
Step 2: Select the “Services” Tab and uncheck the checkbox “Hide all Microsoft services in the bottom left corner.” Click on Ok.
Step 3: Restart your system. Check whether the issue is resolved or not. If not, follow the method given above.
Run as an Administrator
If your account doesn’t have administrator rights, sometimes you will find yourself unable to access specific files and folders. This happens because you don’t have permission to read/write into those files and folders. So here are some ways to fix such issues.
You can change the account type to Administrator and try to resolve the problem. To do so, follow the steps mentioned below.
Step 1: Log out of your current account and log in to another one.
Step 2: Go to the control panel and select “Change Account Type.”
Step 3: Choose “Administrator” from the dropdown menu.
Step 4: Click OK.
Step 5: Restart your computer.
Cleaning up your hard drive
Disk Cleanup is a simple utility included with Windows 7 and later versions. It allows you to clean out temporary files, recycle unused disk space, defragment hard drives, and delete old log files. You can use Disk Cleanup to free up disk space and optimize performance.
Step 1: Click the Start button.
Step 2: Type “disk cleanup” into the Search bar and press Enter key.
Step 3: Click on the Disk Cleanup icon.
Step 4: Click on the Advanced tab.
Step 5: Check the boxes next to each option and click OK.
Step 6: Wait till the process completes.
Step 7: Restart the computer.
Run a scan of the system files
This error occurs due to corrupted system files, and it might lead to data loss. In such cases, you can use the System File Checker tool to repair system files. This tool scans the entire computer and checks for missing or corrupt files. You can run this tool manually or schedule it to run automatically. To do this, follow the steps given below:
Step 1: Right-click the command prompt icon in the search results and select Run As Administrator.
Step 2: Now type sfc /scannow and press Enter.
Step 3: Wait for the process to complete. If there are no errors, you can close the window.
Restart the computer cleanly
Sometimes, third-party software like anti-virus programs blocks access to specific files. This can cause missing drivers, system crashes, and even data loss. If you want to ensure that no third-party software blocks your access to specific files, it is best to clean your boot.
To do this, press the “Windows key + R,” type “MSConfig,” and click OK. On the next screen, select “Boot.” Next, go to “Startup Tab” and uncheck everything listed there except for those items that are necessary. You can add items here, too. Finally, click on “Save Changes” and restart your computer.
Check for errors with Chkdsk
Disk errors can occur due to many reasons such as damaged hardware components, virus attacks, power surges, and even software issues. If you notice a sudden slowdown in computer performance, it could mean that there is some sort of problem with the Windows operating system. In case your PC starts showing blue screens, rebooting itself repeatedly, or displaying strange messages, it is vital to perform a quick check on the hard drive. You can do this by running a chkdsk scan. Here are the steps to do so:.
Step 1: Open the Start menu, type “chkdsk /r” into the Search box, and press Enter.
Step 2: A command prompt window will open up. Type “Y” to confirm the action.
Step 3: Wait for the process to complete. Once done, restart your computer to see whether the issue has been resolved.
APPROVED: To fix Windows errors, click here.