- Download and install the software.
- It will scan your computer for problems.
- The tool will then fix the issues that were found.
There are two ways to send a fax with Windows 10: One way is through the built-in faxing app, the other is by sending files to specific email addresses. However, there are some limitations to both methods. For example, you cannot send a fax to multiple people; you must choose one recipient per document. And if you want to scan documents, you’ll need to use a scanner application like HP Scanjet. But what happens if you’re trying to send a file to several different recipients and it says “No scanners were found”? Here are effective easy solutions to fix this problem.
Table of Contents:
Is there a reason why my computer does not detect any scanners?

Do you see a “Scanner Not Found” error message or your scanner is not recognized by your computer when you try to use the scanner from your computer? Don’t worry. You can solve the problem of an unrecognized scanner. Many users have solved their problems with the solutions presented in this article.
Normally, the hardware device should work after you turn on the power. However, if Windows does not recognize the scanner, the problem may lie in the scanner itself, the cable, or the computer software. Try the following methods to troubleshoot the problem and solve “Scanner not detected” step by step.
Make sure your scanner’s driver is up-to-date
The scanner driver needs to be updated periodically. As long as there are newer versions of the driver available, you won’t experience problems with the scanner. However, if you’re experiencing issues with your scanner, check whether the latest version of the driver is installed in your system. In most cases, you’ll find the driver in the “Drivers” folder under the Windows directory. To update the driver, open the file manager and navigate to the location where the driver is located. Select the driver and press the “Update Driver” button.
If you still encounter problems with your scanner, you can use a third-party tool to scan the entire PC and locate all the current drivers. Then you just need to select the ones you want to update and click the “Update Drivers” button.
Updated: April 2025
This tool is highly recommended to help you fix your error. Plus, this tool offers protection against file loss, malware, and hardware failures, and optimizes your device for maximum performance. If you already have a problem with your computer, this software can help you fix it and prevent other problems from recurring:
- Step 1 : Install the PC Repair and Optimizer Tool. (Windows 10, 8, 7, XP, Vista).
- Step 2 : Click Start Scan to determine what problems you are experiencing with your computer.
- Step 3 : Click Repair Allto resolve all problems.

Perform a hardware troubleshooting procedure
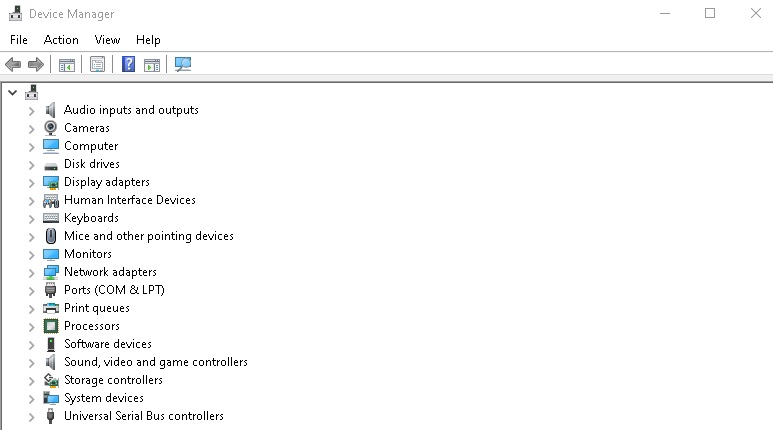
If you’re having trouble getting your fax modem working, there are some things you can try. First things first though, let’s make sure we know what exactly is wrong. To do that, open Control Panel and select Device Manager.
From here, expand Network adapters and look for anything labeled ‘Modem’ or ‘Fax’. If you see something like “The device cannot start because the following error occurred…”, click on Details. From here, you’ll want to find out whether there are any problems with drivers or configurations.
To do that, click on Troubleshoot. You’ll now be presented with several options. Click Start. After a few seconds, you’ll be taken to the next screen where you can choose one of three solutions.
Check for software conflicts: This option will scan your computer for any software conflicts that could prevent your modem from loading properly.
Update Drivers: Choose this solution if you’ve already installed updated versions of your modem’s drivers and nothing seems to work.
Install Driver Software: Choose this solution if none of the above worked and you still don’t seem to have a functional modem.
After selecting one of the solutions, follow the instructions to complete the process. Once completed, close the window and restart your computer.
The scanner configuration needs to be re-configured
If the problem still persists, there might be something wrong with the configuration of the scanner. You’ll need to reconfigure it manually. Here’s how:
1. Connect your scanner to your computer via a USB cable.
2. Open the Device Manager.
3. Find the “USB Composite ADI Controller”, select it and press Uninstall button.
4. Right-click on the newly removed controller and choose Add New Hardware Wizard.
5. Choose Scanner from the list of devices, make sure that the driver matches the model number of your printer/scanner, and continue.
6. Your scanner should now work fine.
7. To prevent future problems, remember to disable automatic scanning.
Verify that the cables are functioning correctly
Sometimes the cable issue can also lead to the problem. You might even think that it’s just a simple case of having unplugged the power cord from the wall socket, but there could be something else wrong. Here are some tips to help diagnose the problem.
1. Make sure that the cables are functioning properly, and plugged correctly at both ends. This includes USB ports, Ethernet jacks, power cords, and hard drives.
1. If possible, you can try replacing one of the cables with another to see if it’s a faulty cable. For example, if you’re trying to connect a laptop to a desktop computer, you can swap out the keyboard and mouse cables.
3. If it’s a wireless printer, make sure the wireless signal is strong enough to reach the device. If it isn’t, you’ll want to change the position of the wireless router or replace the router altogether.
Make sure Fax and Scan are disabled and enabled again
If you’re having problems with Windows Fax & Scan, you might want to try disabling it entirely. This way, you won’t have to worry about accidentally enabling it again. To do this:
1. Open the Start Menu and enter “Windows Features.”
2. Click on Turn Windows features on or off.
3. Scroll down to find the option labeled “Fax and Scan,” and select Disabled.
4. Restart your computer.
5. When prompted, choose whether you’d like to enable or disable Windows Fax and Scan.
6. Select OK.
Compatibility with modems should be checked
A lot of people are having trouble with the scanner, so we checked the compatibility of our devices. We tested three different models of scanners: HP Officejet Pro 8730dn, Brother MFC-J6710DW, and Canon CanoScan LiDE 110. All of them work fine. However, some users reported that the scanner didn’t show up in the list of compatible devices. This happens because the driver isn’t installed properly. To solve the problem, go to Device Manager, find the printer/scanner and install the latest driver. Alternatively, you can use the following steps:
1. Open Control Panel.
2. Click System and Security.
3. Click Administrative Tools.
4. Double-click Add or Remove Programs.
5. Locate the program called Microsoft Print Driver. Right-click it and select Uninstall.
6. Close the window.
APPROVED: To fix Windows errors, click here.
Frequently Asked Questions
How to get Windows Fax and Scan to recognize the scanner?
- Select Start -> Settings -> Devices -> Printers and Scanners or use the following button. Open the printer and scanner settings.
- Select Add Printer or Scanner. Wait until nearby scanners are detected, then select the scanner you want, and then select Add Device.
Why does Windows Fax and Scan not recognize my scanner?
If you have the following problem: The scanner is not detected by Windows Fax and Scan, you may try unplugging the scanner and plugging it into a different USB port in order to see if it works. You can also try replacing the USB cable to rule out a faulty USB cable.
Why can’t my computer find my scanner?
If your computer can't recognize a working scanner connected via USB, serial or parallel port, the problem is usually due to outdated, corrupt, or incompatible device drivers. This can usually be easily fixed by obtaining and installing new drivers.