- Download and install the software.
- It will scan your computer for problems.
- The tool will then fix the issues that were found.
Google Meet offers a great video calling experience, which is why it is used by a large number of users around the world. With Google Meet, people can communicate during a meeting, no matter where in the world they are. Google Meet contributes significantly to the efficiency of work in companies, especially large ones.
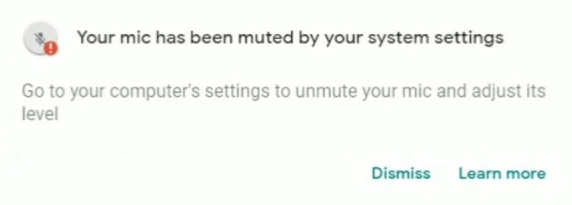
But like other programs, it has its problems. One of the most common error messages when using Google Meet is that the microphone is disabled in the system settings. Don’t worry, because in this article, you’ll find some of the best steps to fix the “Microphone is disabled by system settings” error.
Table of Contents:
What causes this error
- Incorrect sound settings: Incorrect sound settings can interfere with audio output.
- Outdated microphone drivers: An outdated microphone driver usually causes problems with no sound, failed recording, or a disconnected microphone.
- Faulty microphone driver: Sometimes the problem can also be caused by a corrupt or missing driver. To fix this problem, update the microphone drivers.
- Faulty microphone: Make sure that your microphone is in good condition. If your microphone is broken from the inside, it should be replaced or repaired.
- The microphone does not turn off: There are many settings in Windows that block applications from accessing the microphone. Sometimes these settings are accidentally disabled and block the microphone from accessing the app.
Here’s how to fix this problem
Reset microphone settings
So you’ve been having some trouble with your microphone settings in Windows 10, and you’re not quite sure how to fix it. Don’t worry, we’ve got you covered. Here are four simple steps you can follow to reset your microphone settings and get your voice sounding crystal clear again.
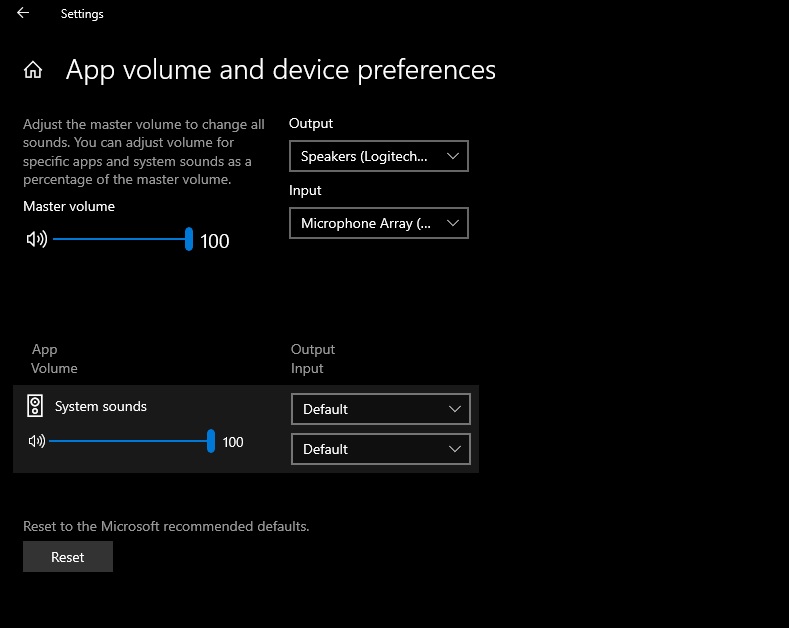
- First, open up the Control Panel and navigate to the Sound settings.
- Next, go to the Recording tab and find your microphone in the list of devices.
- Once you’ve found it, double-click on it to open up its properties.
- From here, go to the Levels tab and make sure that your microphone is turned up all the way.
- Finally, click on OK to save your changes and close out of the window.
By following these four simple steps, you’ll be able to reset your microphone settings in Windows 10 and get your voice sounding great again in no time.
Updated: April 2025
This tool is highly recommended to help you fix your error. Plus, this tool offers protection against file loss, malware, and hardware failures, and optimizes your device for maximum performance. If you already have a problem with your computer, this software can help you fix it and prevent other problems from recurring:
- Step 1 : Install the PC Repair and Optimizer Tool. (Windows 10, 8, 7, XP, Vista).
- Step 2 : Click Start Scan to determine what problems you are experiencing with your computer.
- Step 3 : Click Repair Allto resolve all problems.

Run microphone troubleshooter
If you’re having trouble with your microphone on Windows 10, you can try running the built-in troubleshooter to diagnose and fix the problem. Here’s how:
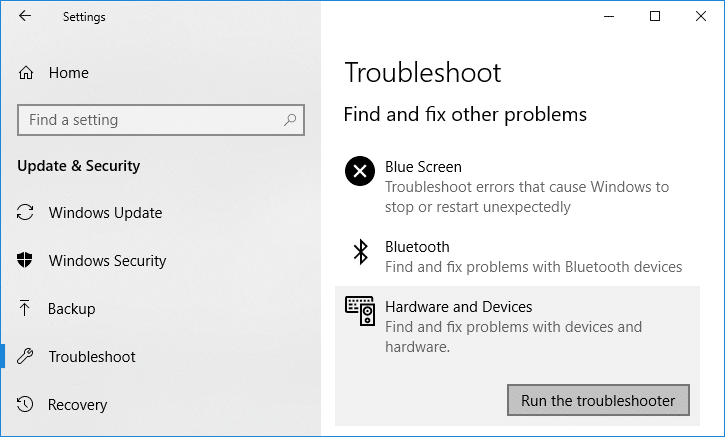
- Go to Start > Settings > Update & Security > Troubleshoot.
- Under “Find and fix other problems,” select speech, inking, or typing.
- Select Run the troubleshooter.
- Follow the on-screen instructions.
If that doesn’t resolved the issue, you can try resetting your microphone settings. To do that:
- Go to Start > Settings > Privacy > Microphone.
- Turn off Allow apps to access your microphone.
- Restart your PC and check if the problem persists.
- If it does, go back to Microphone settings and turn on Allow apps to access your microphone.
- Make sure the app you’re using is allowed to access your microphone.
Run hardware and device troubleshooter
- On your keyboard, press the Windows logo key and type control panel. Then click Control Panel in the search results.
- In Control Panel, click Hardware and Sound > View devices and printers.
- Right-click your computer name in the Devices and Printers window, and then select Device installation settings.
- In the Device Installation Settings window, select Yes (recommended), and then click Save Changes.
- Back in the Devices and Printers window, find and right-click the webcam device you want to troubleshoot, and then select Run the troubleshooter from the menu.
- Follow the on-screen instructions to complete the Hardware & Devices troubleshooter.
- After that, restart Windows 10 and check if your webcam works again.
Update microphone drivers
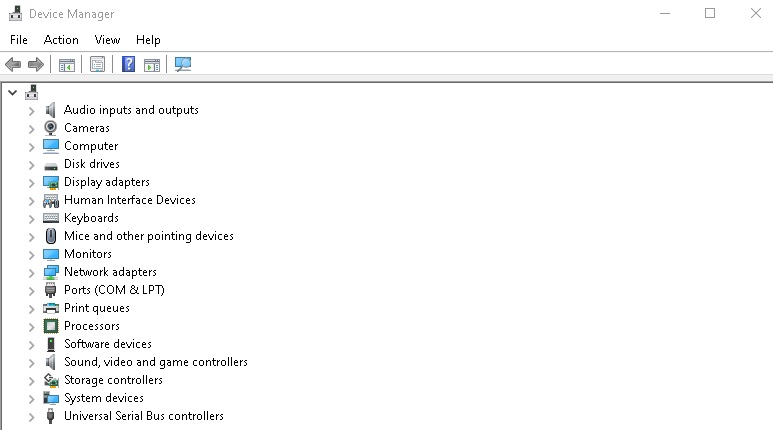
- Click the Start button, then choose Settings from the list of options.
- In the window that opens, select System from the list of options on the left.
- In the main window, select Sound from the options on the left.
- Under Input, find your microphone and select it to open the Microphone properties window.
- Under Choose your input device, select the proper microphone from the list, and click Apply. If you don’t see your microphone listed, make sure it’s plugged in and turned on.
- Test your microphone to make sure it’s working properly. If it isn’t, you may need to uninstall and reinstall your drivers.
Run SFC scan
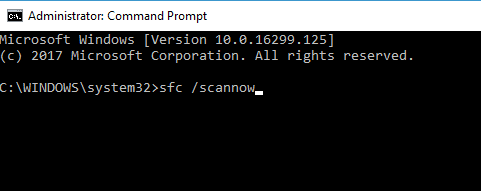
To run an SFC scan on Windows 10, follow these steps:
- Open the Start menu and type ‘cmd’.
- Right-click on the ‘Command Prompt’ option and select ‘Run as administrator’.
- Type ‘sfc /scannow’ into the Command Prompt window and press Enter.
- The scanning process will take some time to complete. Once it is finished, you will see a message indicating whether or not any corrupt files were found.
- If corrupt files were found, they will be repaired automatically. Reboot your computer and run the scan again to confirm that the issue has been resolved.
APPROVED: To fix Windows errors, click here.
Frequently Asked Questions
Why does Google meet keep muting my mic?
To do this, first, go to Settings > Privacy. Then scroll down to Microphone on the left. There you will see the option "Allow apps to access your microphone". Simply turn this option on to get started.
Why is my microphone muted?
If the sound is still muted, the system volume may have been unknowingly turned off. Most likely, the internal or external microphone has been disabled, so no sound is being sent through that device. Other inappropriate sound settings may have a similar effect.
Why is my microphone automatically muted?
There are many reasons why your microphone automatically mutes without your permission, it could be due to improper sound settings. It can also be caused by faulty drivers, viruses, malware, etc.