Updated April 2025: Stop these error messages and fix common problems with this tool. Get it now at this link
Windows 11 is the latest update to Microsoft’s Windows operating system. It offers handy tools to help you optimize your screen and maximize performance. However, like any other software, this version is prone to bugs and flaws. Fortunately, there are several troubleshooting methods that can help you solve this problem. So, let’s find out what you can do to solve this problem without further ado. In this article, you will learn some troubleshooting methods that can help you solve the 0x80070643 update error.
Table of Contents:
What causes error 0x80070643 in Windows 11?

The error message 0x80070643 is usually the result of the following causes:
- Driver malfunction: Outdated or incompatible device drivers can often lead to errors. So, it is important to make sure that all your drivers are up-to-date.
- Malware or virus infection: Malicious software or viruses can often damage or corrupt system files, which can lead to this error. So, it is important to scan your system for malware or viruses and remove them.
- Damaged or missing system files: If some system files are damaged or missing, it can often lead to errors. So, it is important to make sure that all your system files are intact and in their proper place.
- Improperly configured system settings: If your system settings are not properly configured, it can often lead to errors. So, it is important to make sure that all your system settings are configured correctly.
- Windows computer was not properly shut down or unplugged while running: This can often lead to errors. So, it is important to make sure that your computer is properly shut down or unplugged when not in use.
- Old versions of programs that were not properly uninstalled when the new version was loaded: This can often lead to errors. So, it is important to make sure that you uninstall the old version of a program before installing the new version.
This tool is highly recommended to help you fix your error. Plus, this tool offers protection against file loss, malware, and hardware failures, and optimizes your device for maximum performance. If you already have a problem with your computer, this software can help you fix it and prevent other problems from recurring:
Updated: April 2025

How to fix error 0x80070643 in Windows 11?
Launch the Windows Update Troubleshooter
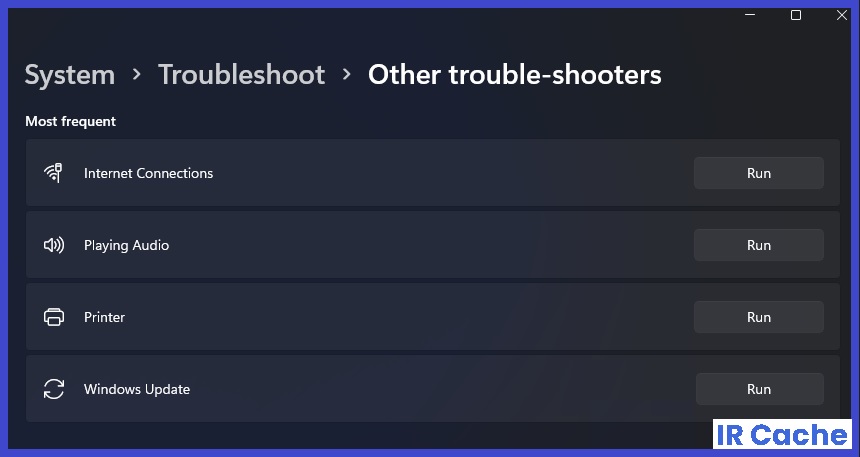
If you’re having trouble with Windows Update, don’t worry – you’re not alone. Many users have reported issues with the update process, and Microsoft has released a troubleshooter to help fix the problem. Here’s a step-by-step guide on how to run the troubleshooter:
- Go to the Start menu and type ‘troubleshoot’.
- Select ‘Troubleshoot settings’ from the list of options that appears.
- Scroll down to the ‘Get up and running’ section and select ‘Windows Update’.
- Click ‘Run the troubleshooter’.
- Follow the prompts to complete the troubleshooting process.
With any luck, this will resolve your Windows Update issues. If not, there are a few other things you can try, such as resetting the Windows Update components or manually installing the latest updates. But before you go down that road, be sure to check out Microsoft’s support page for more detailed instructions.
Run an SFC scan
Windows 11 offers a number of ways to perform an SFC scan. The most straightforward way is to use the Command Prompt.
- To do this, simply open the Command Prompt as Administrator and type sfc /scannow. The scan will then begin and will take some time to complete. If any corrupt files are found, they will be replaced with the correct version from Windows 11’s cache.
- Another way to run an SFC scan is to use Windows PowerShell. To do this, open the PowerShell as Administrator and type Get-FileIntegrity-Scan-FullScan. Once again, the scan will take some time to complete but will replace any corrupt files that it finds.
- Finally, you can also use the DISM tool to run an SFC scan. This tool can be found in the Windows 11 installation media. To use it, simply insert the media and navigate to the sources\sxs folder. From here, run the following command: dism /online /cleanup-image /scanhealth. This will start the scan and will take some time to finish. As with the other methods, any corrupt files that are found will be replaced with the correct version from Windows 11’s cache.
Disabling all third-party antivirus programs on your computer
When you’re finished with an Antivirus program on Windows 11, you’ll want to make sure it’s truly from your system. Here’s how to disable any third-party Antivirus on your computer:
- Right-click the Start button and select “Apps and Features” from the drop-down menu.
- Find the Antivirus program in the list of installed programs and click on it.
- Select “Uninstall” and follow the prompts to remove the program from your system.
- Once the uninstall process is complete, reboot your computer.
- After your computer restarts, open the Start menu and type “Windows Security” into the search bar.
- Select “Windows Security” from the search results and click on the “Settings” tab.
- Under the “Virus & threat protection” section, click on the “Manage settings” option.
- Toggle off the “Real-time protection” switch and then click on “OK.”
- Reboot your computer once again and then try to install the updates.
Clean Boot Windows 11
- Restart your computer and press the “F8” key on your keyboard while the computer is booting up.
- On the Boot Options menu, select Safe Mode with Networking using the arrow keys on your keyboard and then press “Enter.”
- Once your computer starts in Safe Mode, open the Microsoft System Configuration utility by clicking “Start,” typing “MSConfig” in the Search box, and pressing “Enter.”
- Click the “Services” tab, check the “Hide all Microsoft services” box, and click “Disable all.”
- Click the “Startup” tab, click “Disable all” and click “OK.”
- Restart your computer normally to complete the Clean Boot process. Microsoft recommends restarting your computer at least once a week to keep your system running smoothly.
APPROVED: To fix Windows errors, click here.
Frequently Asked Questions
How do I fix error 0x80070643?
- Repeat the installation.
- Download the file again.
- Uninstall the application and install it again.
- Check your Internet connection.
- Close all other programs.
- Stop all current downloads and updates.
- Reboot your computer.
- Run Windows Update troubleshooting.
How do I fix Windows 11 installation assistant error?
The Windows 11 installation assistant is a program that helps you download and install updates for your computer. If you're having trouble with the installation assistant, there are a few things you can try:
- Make sure you're connected to the Internet.
- Check your date and time settings.
- Make sure your computer meets the minimum system requirements for Windows 11.
- Run the Windows Update troubleshooter.
What is the cause of this 0x80070643 problem?
There are a few possible causes for this problem:
- Your date and time settings are incorrect.
- The Windows Update service is not running.
- Your computer is not connected to the Internet.
- Your computer does not meet the minimum system requirements for Windows 11.