Updated April 2025: Stop these error messages and fix common problems with this tool. Get it now at this link
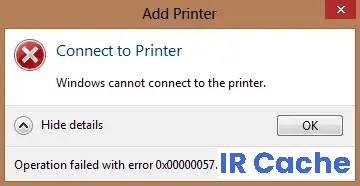
Error 0x00000057 is a printer-related error in Windows that prevents the user from adding a printer. This error is usually caused by damaged previously installed drivers and authorization issues. Thus, if you try to add a printer, it will be installed but not added due to corrupted files in the DriverStore.
Table of Contents:
What causes printer error 0x00000057?
- Printer error 0x00000057 is mainly caused by corrupted system files, faulty drivers, etc.
- Another possible cause that causes this printer installation error is faulty printer drivers.
- An improperly configured network connection can also prevent the device from connecting the printer through the server.
How to resolve printer error 0x00000057?
This tool is highly recommended to help you fix your error. Plus, this tool offers protection against file loss, malware, and hardware failures, and optimizes your device for maximum performance. If you already have a problem with your computer, this software can help you fix it and prevent other problems from recurring:
Updated: April 2025

Adding a local server from print management
- Press Windows + R, type MMC, and press Enter to open the Microsoft Management Console.
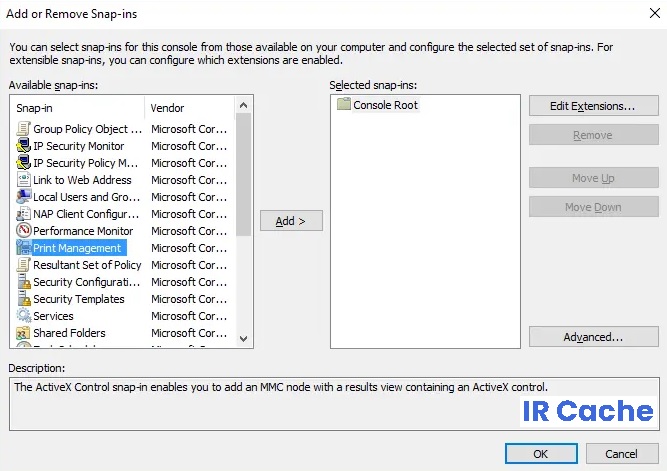
- Then click File and select Add/Remove Snap-in.
- Then select the following options:
- Print Management -> Click Add Local Server -> Done -> OK
- Now expand the print server, then the local server, and finally click on Driver.
- Find the driver that is causing you problems and uninstall it.
- Reinstall the printer and you should be able to resolve the error.
Adding a local printer over the network
- Press the Windows + X key and select Control Panel.
- Then select Devices and Printers and click Add Printer.
- Select Create New Port and select the Local Port type.
- Then enter the network path to the printer (for example, \ComputernameSharedPrinterName) as the port name.
- Then select the printer from the list and select “Replace currently installed driver”.
- Select whether you want to share the printer or not, then select whether you want to set this printer as the default printer or not.
APPROVED: To fix Windows errors, click here.
Frequently Asked Questions
How do I eliminate the “Windows cannot connect to a printer” message?
- Press Win+R (the key with the Windows logo and the R key) simultaneously. A Run dialog box will open.
- Type printmanagement.msc in the Run field and click OK.
- In the left pane, click All Drivers.
- In the right pane, right-click the printer driver and choose Remove from the pop-up menu.
- Add the printer again.
Why won’t my printer connect to my computer?
Many problems connecting to your computer are caused by something as simple as a loose cable. Make sure that all of the cables connecting your computer to the printer are present and properly connected at both ends. If the printer won't turn on, the problem may also be the power cable.
How can I fix the fact that my printer driver is not working?
- Go to the printer manufacturer's website and search for a printer driver or driver.
- Find the appropriate driver for your printer model.
- Download and install the driver.
- You may need to restart your computer after installing the new driver.
How do I fix a printer error?
- Make sure the printer is turned on and connected to the same Wi-Fi network as your device.
- Restart the printer.
- Set your printer as the default printer.
- Remove the print queue.
- Reset the service that manages the print queue.