- Download and install the software.
- It will scan your computer for problems.
- The tool will then fix the issues that were found.
A critical error in Windows 10 is related to the Start menu not working. It occurs when certain files are corrupted. Sometimes only the Start menu suffers, but sometimes the search function, Cortana, and the Start menu also suffer. Read this page to stop such a critical error and solve the access problem. This step-by-step guide will tell you how to fix the error.
The error message you receive should look like this:
“Critical error – your Start menu is not working. We’ll try to fix the problem the next time you log in.”
Table of Contents:
Why does this error occur?

The Start menu is one of the most used features of the Windows operating system, and since the release of Windows 10, Microsoft has changed its appearance and design. A critical error in the Start menu occurs when the operating system closes a program due to internal problems.
These errors can be caused by one of the following:
- Memory usage errors.
- Corrupted documents.
- Certain registry errors.
- Corrupted system files.
If you shut down your computer during the update, your files may be corrupted. It’s worth remembering that these problems can affect other components as well. When they connect, Windows reports a critical Windows 10 error – “Your Start menu is not working. We’ll try to fix it the next time you log in.”
How to fix this error?
Check system files
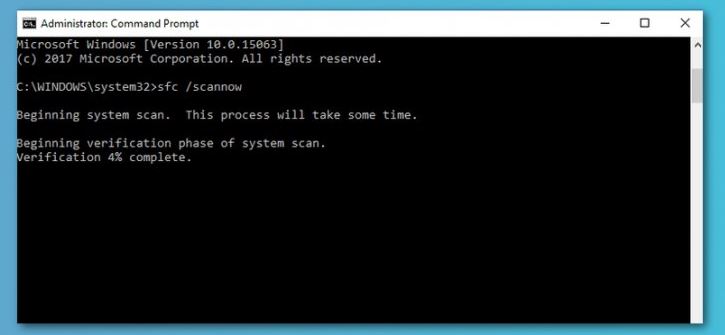
SFC scan is a utility in Windows 10 that can scan for corrupted files and replace them. Here’s how to run an SFC scan:
- Press the Windows key + X to open the Power user menu, then select Command Prompt (Admin). If you’re prompted for an administrator password or confirmation, type the password or provide confirmation.
- In the Command Prompt window, type the following command and press Enter: sfc /scannow This will initiate the scan and may take some time to complete.
- Once the scan is finished, you should see a message that says “Windows Resource Protection found corrupt files and successfully repaired them.” If no errors were found, you’ll see a message that says “Windows Resource Protection did not find any integrity violations.” Either way, you can now close the Command Prompt window.
Create a new user account with administrator privileges
It’s easy to create a new user account with administrative privileges on Windows 10. Just follow these simple steps:
- Right-click on the Start button and select “Control Panel” from the menu.
- In the “Control Panel” window, click on “User Accounts.”
- In the “User Accounts” window, click on “Manage User Accounts.”
- In the “Manage User Accounts” window, click on “Add New User.”
- In the “Add New User” window, enter the desired username and password for the new account. Be sure to select “Administrator” from the drop-down menu for the account type.
- Click on “Create Account.”
- That’s it! You’ve now created a new user account with administrative privileges on Windows 10.
Updated: April 2025
This tool is highly recommended to help you fix your error. Plus, this tool offers protection against file loss, malware, and hardware failures, and optimizes your device for maximum performance. If you already have a problem with your computer, this software can help you fix it and prevent other problems from recurring:
- Step 1 : Install the PC Repair and Optimizer Tool. (Windows 10, 8, 7, XP, Vista).
- Step 2 : Click Start Scan to determine what problems you are experiencing with your computer.
- Step 3 : Click Repair Allto resolve all problems.

Perform a clean boot
A clean boot is when you start Windows with a minimal set of drivers and startup programs to help troubleshoot issues. This means that when you clean boot, only the essential drivers and programs are loaded. Follow these steps to clean boot your Windows 10 PC:
- First, type ‘msconfig’ in the search box and hit Enter to open System Configuration.
- Then, go to the ‘General’ tab, click ‘Selective startup’, and uncheck the ‘Load startup items’ checkbox.
- Once that’s done, go to the ‘Services’ tab, check the ‘Hide all Microsoft services’ checkbox, and click ‘Disable all’.
- Finally, click ‘OK’. This will prompt you to restart your computer. Do so and see if the problem persists. If it doesn’t, then one of the disabled programs or services was causing the issue. You can re-enable them one at a time to narrow down which one it is.
Update or uninstall a third-party antivirus program
It’s important to keep your computer safe from viruses and other malware, and one way to do that is to use a third-party antivirus program. If you’re using Windows 10, there are a few different ways to update or uninstall your antivirus software. Here’s a quick rundown of the steps you’ll need to take:
Update your antivirus software:
- Open the program and look for an “Update” button or menu option.
- Once you’ve found it, click or tap on it and follow the instructions to download and install the latest virus definitions.
Uninstall your antivirus program:
- Go to the “Control Panel” in Windows and find the “Programs and Features” section.
- Locate your antivirus program in the list of installed programs, select it, and click “Uninstall.”
- Follow any prompts that come up to complete the process.
Keeping your computer safe from viruses is important, so make sure you keep your antivirus software up-to-date. And if you ever want to uninstall it, follow the steps above.
Download the Microsoft Start Menu Troubleshooter
Microsoft has released a Start Menu troubleshooter for Windows 10 that can be used to fix common Start Menu problems. Here’s how to download and use it:
- Go to the Microsoft Support website and click on the “Download” button for the Start Menu troubleshooter.
- Save the file to your computer and then launch it.
- Follow the instructions on-screen to run the troubleshooter.
- Once the troubleshooter has finished, restart your computer and check if the Start Menu is working properly.
- If not, you can try running the troubleshooter again, or alternatively, you can reset your computer.
Use the “Reset this PC” feature
Windows 10 offers a built-in tool to reset your PC and start fresh. This can be a useful troubleshooting step if you’re experiencing problems with your PC. Here’s how to use the “Reset this PC” feature:
- Go to Start > Settings > Update & Security > Recovery.
- Under “Reset this PC,” click Get started.
- You’ll be given two options: “Keep my files” and “Remove everything.” Choose the option that you want.
- If you choose “Keep my files,” Windows will reinstall itself, but keep your personal files and settings intact. If you choose “Remove everything,” Windows will erase everything from your hard drive, including your personal files and settings.
- Follow the prompts to complete the reset process. Once it’s finished, your PC will restart and should be working properly again.
APPROVED: To fix Windows errors, click here.
Frequently Asked Questions
How do I fix critical error Start menu isn’t working?
- Press Windows + L to log out when you open Windows 10.
- Hold down the 'Shift' key on your keyboard and press the power button, then 'Restart'.
- Your computer should now reboot and display the boot options. From the 'Troubleshooting' menu, go to 'Advanced Options' and click on 'Boot Options'.
- Click the 'Restart' button to restart your computer.
- After rebooting, press F5 to enter "Safe Mode".
- Once you enter Safe Mode, the Windows 10 Start menu and the critical "Cortana not working" error will be fixed. All you have to do now is reboot your computer.
What causes critical error Start menu?
A critical error occurs when the operating system shuts down a program or process due to internal problems. These errors can be caused by memory usage conflicts, corrupted files, etc. If you shut down your computer while the update is running, your files may be corrupted.
What do I do if my Start menu isn’t working?
- Open the Task Manager and click File > Run New Task.
- Enter powershell in the Create new task field. Enable the "Create this task with administrator privileges" option. Click OK.
- In the Windows PowerShell administrative window, type the following and press Enter:
- Get-appxpackage -all *shellexperience* -packagetype bundle |% {add-appxpackage -register -disabledevelopmentmode ($_.installlocation + “\appxmetadata\appxbundlemanifest.xml”)}
- Allow the process to complete, then reboot the system.