- Download and install the software.
- It will scan your computer for problems.
- The tool will then fix the issues that were found.
Error code 0x80300024 is one of those errors you don’t want to see. If it pops up during the installation process, it usually indicates something wrong with the computer hardware or software. In most cases, you can ignore the error and continue with the setup process. However, if you encounter this error while trying to install Windows 10, you might want to try some troubleshooting steps.
Error 0x80300024 is one of the most common errors while installing Windows 10. In this article, we are going to discuss what causes it and how to fix it. Error 0x80300024 happens when there is not enough free space left on the disk partition where the operating system will be installed. You might think creating an extra partition is the best solution, but unfortunately, this won’t work because Windows needs around 8 GB of free space. So, how do you solve this problem? Well, you should create an additional partition and make sure that you don’t run out of space during installation. Here are some tips to help you avoid getting this error again.
Table of Contents:
Make sure all accessories are connected
When the error code 0x80300024 appears during the installation process, it usually indicates a problem with one of the following components: hard disk, CD/DVD drive, USB flash drive, etc. If everything seems fine, we recommend checking whether all the required accessories are connected and working correctly.
1. Connect the installation location (hard disc) to the drive.
2. Make sure that the connection between both devices is stable.
3. Try installing Windows again.
4. Check whether the size of the installation location is correct. If not, change it accordingly.
5. Reboot the system.
6. Check whether the error 0x80300024 is solved.
Updated: April 2025
This tool is highly recommended to help you fix your error. Plus, this tool offers protection against file loss, malware, and hardware failures, and optimizes your device for maximum performance. If you already have a problem with your computer, this software can help you fix it and prevent other problems from recurring:
- Step 1 : Install the PC Repair and Optimizer Tool. (Windows 10, 8, 7, XP, Vista).
- Step 2 : Click Start Scan to determine what problems you are experiencing with your computer.
- Step 3 : Click Repair Allto resolve all problems.

Hard drives that are not necessary should be removed
When installing Windows, you should permanently remove all unnecessary hard drives. This helps prevent problems during the installation process. You can do this easily by disconnecting any external hard drives, USB devices, and optical discs that aren’t needed. If you’re unsure whether something is valid or not, it’s better to take it off anyway rather than risk damaging your computer.
If you accidentally left one of your hard drives attached, check if the installation was completed successfully. If it did, you know there’s nothing wrong with your PC. Otherwise, look up how to fix common errors related to hardware and software. For example, you might see that your hard drive is damaged or that you don’t have enough memory installed.
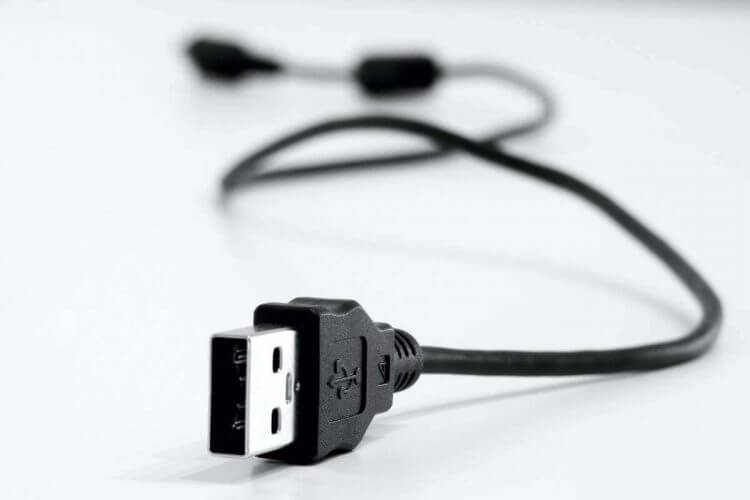
Changing the USB port may help
If you see the following error while installing Windows 10, it could mean that your computer doesn’t recognize the USB flash drive correctly. In this case, you’ll want to check out our guide on how to fix the “USB device not recognized.” However, there is another way to resolve this issue. If you’re having trouble installing Windows 10, you might find this helpful tip.
The problem occurs because Windows uses specific drivers to connect to the USB ports on your computer. These drivers are stored inside a file called usbinf_winusb3.sys. When you insert a USB flash drive into one of your USB ports, Windows looks to determine what type of driver it needs to use to communicate with the drive. Unfortunately, your computer doesn’t know about some newer types of drives, such as those used for SSDs and thumb drives. So, when Windows tries to load the usbinf_winusb2.sys file, it gets stuck trying to load it.
To solve this problem, you can change the USB port that Windows uses to look for drivers. To do this, follow these steps:
1. Restart your PC.
2. Open Device Manager.
3. Right-click on each USB port listed under Universal Serial Bus controllers.
4. Select Update Driver Software… from the context menu.
5. Click Browse my Computer… to locate the folder where you saved the usbinf_WinUSB3.sys file.
6. Choose the.inf extension for the file and click Next.
7. Accept the license agreement and then select the appropriate version of the file.
8. Click Install.
9. Wait until the installation completes.
It is essential to make sure the order of the boot disks is correct
If you are having trouble booting into Windows 10, it might be because the hard disk where you installed Windows is placed at the end of the boot order. If that happens, you cannot access the operating system without pressing F12 during startup. In such cases, you must go to the BIOS setup utility and change the boot order.
1. You can do this manually by opening the BIOS setup utility and moving the hard disk to the front of the boot priority list. Alternatively, you can use third-party software to automate the process.
2. Once you have moved the hard disk to the beginning of the boot order, restart the computer and try again.
3. After installing Windows 10, make sure that you select UEFI as the boot method.
4. Make sure you save the changes and exit the BIOS setup before rebooting.
5. After installing Windows, make sure that you have chosen UEFI as the boot setting.
6. Restart the computer once again, and try accessing Windows 10.
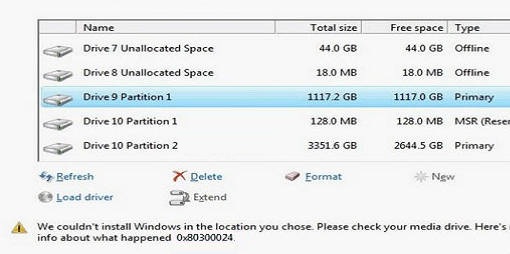
Set up the installation location
Before formatting the installation location, make sure that there is no critical data on it. If you want to keep some files on the partition, you can use the Windows Disk Management tool. You can follow the steps below to format the installation location.
1. Open the Start menu and type “Disk management.”
2. Click the “Disk Management” button.
3. Select the installation location.
4. Right-click the selected disk and select “Format.”
5. Choose FAT32 or NTF format.
6. Press OK.
7. Wait for the operation to finish.
8. Restart your computer.
Make sure you have enough disk space
When the drive to install Windows 10 has been occupied by data, and you are getting Windows cannot be installed on “drive X:” error, it could mean that you don’t have enough disk space left on your hard drive. To install Windows 10 on your computer, you must ensure enough space on your hard drive.
You can use a free tool to check how much each file system is using disk space. You can find where the most space is taken up by the operating system, applications, documents, music, pictures, videos, and other types of files.
The following steps show you how to free up disk space on Windows 10.
1. Launch the third-party partition tool.
2. Select the drive where you want to install Windows.
3. Select the option to wipe the entire disk, format the drive, or migrate Windows to SSD/HD.
4. After you make your selection, click Next.
5. On the next screen, you’ll see information about the size of the drive.
6, Make sure that the free space shown is greater than the total amount of data stored on the drive.
APPROVED: To fix Windows errors, click here.