Updated June 2025: Stop these error messages and fix common problems with this tool. Get it now at this link

The Java Virtual Machine is essentially an interpreter that translates Java bytecodes into machine instructions. From time to time, problems may occur when running the Java Virtual Machine.
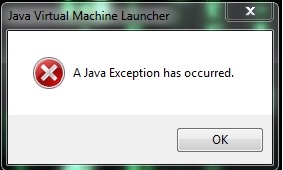
You may get the following error message:
“Could not create the Java Virtual Machine”.
The error is rarely fatal, so you can keep working, but it is annoying. You can fix the error by checking your computer for malware and changing your launcher programs.
Table of Contents:
What causes Java Virtual Machine Launcher error?
- Java executable and/or application requires administrator rights: This can happen with applications that require administrator rights to work properly.
- Java is called with the wrong arguments or options: This can happen if you are running an in-house developed application or trying to open an open-source application that is known to cause system instability.
- Java’s global maximum heap memory is not large enough: One of the most common reasons for this error is that you are trying to run a Java application whose maximum heap memory is larger than what is set in the system variable.
How do I fix the Java Virtual Machine Launcher error?
This tool is highly recommended to help you fix your error. Plus, this tool offers protection against file loss, malware, and hardware failures, and optimizes your device for maximum performance. If you already have a problem with your computer, this software can help you fix it and prevent other problems from recurring:
Updated: June 2025


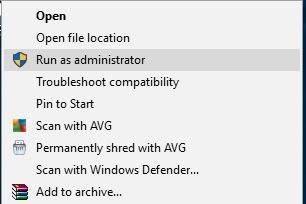
Launch the program as an administrator
- Press the key combination Windows + Q.
- Type Java in the search box.
- Right-click on Java and choose Open File Location from the context menu.
- On the next page, right-click on the Java executable and select the Properties option.
- When the Java Properties window opens, switch to the Compatibility tab.
- Under Settings, check the box next to Run the program as administrator.
- Click the Apply button, and then click OK to save your changes.
- Now close the File Explorer window.
Uninstalling and reinstalling Java
- Select the Start menu, type Add or Remove Programs, then select Add or Remove System Settings.
- Under Applications and Features, scroll to Java, select it, and then select Uninstall.
- Select Yes to confirm. When Java is completely removed, restart Windows.
- Download the latest version of Java for your system.
- Be sure to select 32-bit if your system is 32-bit, or 64-bit if your computer is 64-bit.
- If you are unsure of your system, check your system type first.
- When the download is complete, double-click the installation file.
- Select the Install button to start the Java installation process.
Increasing the available system memory for Java
- Select the Start menu and type Environment Variables.
- Select Change System Environment Variables.
- In the System Properties window, select Environment Variables.
- In the System Variables section, select the Create option.
- Enter _JAVA_OPTIONS as the variable name and -Xmx512M as the variable value.
- Click OK, then OK again.
APPROVED: To fix Windows errors, click here.
Frequently Asked Questions
What does “Cannot create Java virtual machine” error mean?
The Java Virtual Machine uses the -Xmx switch to set the maximum JVM heap size. If you see this error message, the -Xmx switch in the eclipse.ini file is probably set too high for the current environment.
What is the Java Virtual Launcher?
The JVM manages system memory and provides a portable runtime environment for Java-based applications. A Java virtual machine is a program whose purpose is to run other programs. A simple idea is also one of our best examples of kung fu programming.
How do I uninstall and reinstall Java?
- Select the Start menu, type Add or Remove Programs, then select Add or Remove System Settings.
- Under Applications and Features, scroll down to Java, select it and select Uninstall.
- Confirm by clicking Yes. When Java is completely uninstalled, restart Windows.
- Download the latest version of Java for your system.
- Make sure you select the 32-bit version if your system is 32-bit, or 64-bit if your computer is 64-bit.
- If you are unsure of your system, check your system type first.
- Once the download is complete, double-click the installation file.
- Select the Install button to start the Java installation process.