- Download and install the software.
- It will scan your computer for problems.
- The tool will then fix the issues that were found.
This kind of issue is a RunDLL error. It refers to the DLL (.dll) files associated with the Windows registry, which are used to perform simultaneous tasks executed by different programs. RunDLL errors usually occur when a program is not allowed to access a particular code. A virus or malware can also cause these errors.
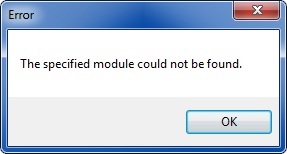
The “Specified module cannot be found” error often occurs when starting Windows or running a specific program. In most cases, the cause is damaged or missing .dll files. This can be due to problems in the Windows registry caused by programs that cannot be adequately removed. The error message often indicates which part of the system is not working properly and gives the full path to the DLL file name. With this information, it is easier to correct the error.
The following manual describes different methods to fix the error “specified module could not be found.”
Table of Contents:
What does ‘the specified module could not be found’ mean?
The error “the specified module could not be found” is a DLL error. It usually occurs when starting Windows or while warming up. This problem can also occur when working with various programs or when trying to connect to the Internet.
The specified module could not be found due to various reasons that can cause Windows 10 errors. In this section, we will briefly show you the reasons that caused the error ‘specified module could not be found.’
1. Missing or corrupted DLL files.
2. Incorrect installation of programs.
3. Outdated Windows drivers.
4. Damaged Windows registry files.
5. Malware attack.
6. Other possible reasons.
In the next section, we will show you how to fix the ‘the specified module could not be found’ error.
If you encounter the same problems, try the following solutions.
Launch the SFC scanner
In the beginning, we will tell you the first way to resolve the problem specified module couldn’t be found.
In this solution, you can try to use System File Checker to check and repair corrupted system files.
Now, let’s see how to do it step by step.
Step 1: Open the Start menu and select the Search option.
Step 2: Type Command Prompt in the search bar and press Enter.
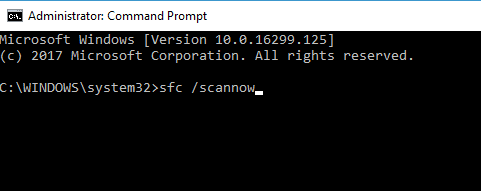
Step 3: Right-click Command Prompt and choose “Run as Administrator.”
Step 4: Type the following command in the opened dialog box.
sfc /scannow
Step 5: Press the OK button to start scanning.
Step 6: Wait till the process finishes.
Updated: April 2025
This tool is highly recommended to help you fix your error. Plus, this tool offers protection against file loss, malware, and hardware failures, and optimizes your device for maximum performance. If you already have a problem with your computer, this software can help you fix it and prevent other problems from recurring:
- Step 1 : Install the PC Repair and Optimizer Tool. (Windows 10, 8, 7, XP, Vista).
- Step 2 : Click Start Scan to determine what problems you are experiencing with your computer.
- Step 3 : Click Repair Allto resolve all problems.

Remove files from the registry
The error “the specified module could not be found” occurs due to improper installation of software. If you are facing this problem while installing Microsoft Office 365 ProPlus 2016, follow the steps mentioned here to solve it.
Step 1: Open Command Prompt window.
Step 2: Type Regedit and hit Enter key.
Step 4: Search for the following string: HKLM\Software\Microsoft\Office\16.0\Common\InstallRoot\MSOABIN32.exe
Step 5: Right click on MSOABIN32.exewhenfoundandchooseDeleteoptionfrommenu.
Step 6: Press the OK button to delete the file.
DLL-related processes must be ended
Another solution to solve the problems the specified module could not be found in Windows 10 is to stop the program related to the specific DLL. Here are some steps to do it.
Step 1: Open the Windows Start menu and type File Explorer Options in the Search bar.
Step 2: Choose the best-matched one and click on it to continue.
Step 3: Go to the View tab and untick the Hide Protected Operating System Files (recommended) option.
Step 4: Click Apply and OK to complete the process.
Step 5: Reboot your PC into safe mode and launch Task Manager.
Step 6: Select the Processes tab and end all the processes related to the specific DLL.
Make sure your computer is virus-free by scanning it
To solve the DLL load failure error, you must scan your computer for viruses. If there are no viruses found, you can try the next solution.
If you find out that your system is infected with a virus, you should remove it immediately. Then restart your computer and run the antivirus software again. After that, you can follow the instructions below to fix the problem.
Step 1: Click the Start button, type cmd in the Search box, and press Enter key.
Step 2: In the command prompt window, type “scannow”. Press Enter key.
Step 3: A Windows Security dialog box appears. Select Yes.
Step 4: When the process finishes, please reboot your computer.
Step 5: Restart your computer.
APPROVED: To fix Windows errors, click here.
Frequently Asked Questions
How do I eliminate the “Specified module cannot be found” error?
- Start your computer in Safe Mode and open Task Manager -> On the Processes tab, select the program that is giving you the "Specified module cannot be found" error and select "End Task" from the context menu to continue.
- Then restart the program and see if the problem is resolved.
What does it mean if the specified module cannot be found?
The error concerns DLL files (.dll), which are linked to the Windows registry and are used for the simultaneous execution of tasks processed by different programs. RunDLL errors usually occur when a program is not allowed to access a particular code.
How can I stop a RunDLL error?
In the Task Scheduler, click Task Scheduler Library and look in the middle list for the entry corresponding to the file reported by the RunDLL error. If you find the entry, right-click it and select Disable. Once the process is disabled, you can close the Task Scheduler in peace.