- Download and install the software.
- It will scan your computer for problems.
- The tool will then fix the issues that were found.
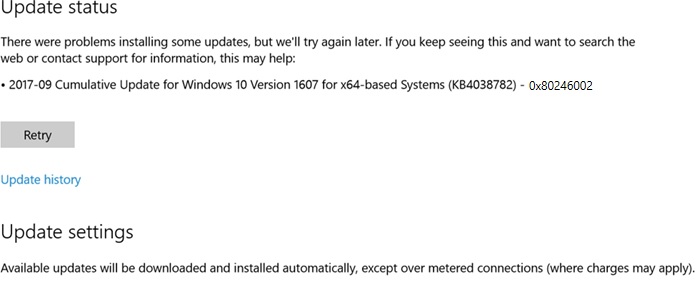
If you encounter error code 0x80246002 when trying to install specific updates or after a failed upgrade to Windows 10 from an earlier version of Windows, this article should help you. In this post, we will identify possible causes and suggest appropriate solutions that you can try to fix the problem.
There is no exact cause for Windows Update error 0x80246002, but it seems that it can be caused by Windows Defender not being able to perform updates, corrupted SoftwareDistribution folder, large user requests on Microsoft Server, etc.
This error can also occur when Windows Update or Microsoft Update detects a hash mismatch when searching for available updates on the Windows Update site or Microsoft Update site.
Table of Contents:
Utilize the windows update troubleshooter
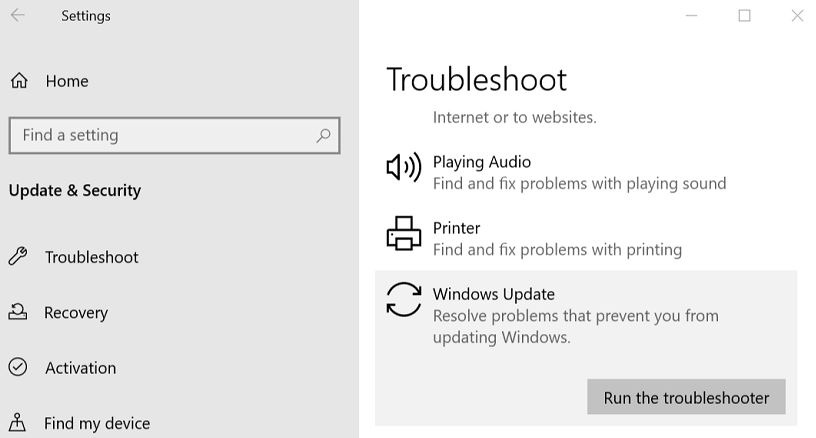
1. Type “troubleshooting” in Windows Search Bar and click on Troubleshooting. This will open up the troubleshooting window.
2. Next, From the left window pane, select View all.
3. Then, from the troubleshoot computer problems list, select Windows update.
4. Follow the on-screen instruction and let the windows update troubleshooter run.
5. Restart your pc to save changes.
Updated: April 2025
This tool is highly recommended to help you fix your error. Plus, this tool offers protection against file loss, malware, and hardware failures, and optimizes your device for maximum performance. If you already have a problem with your computer, this software can help you fix it and prevent other problems from recurring:
- Step 1 : Install the PC Repair and Optimizer Tool. (Windows 10, 8, 7, XP, Vista).
- Step 2 : Click Start Scan to determine what problems you are experiencing with your computer.
- Step 3 : Click Repair Allto resolve all problems.

Manually update Windows Defender
1. Press Windows key+Q and type “Windows Defender” into the search box.
2. Click on the “Windows Defender” option in the search result. This opens up the Windows Defender settings page.
3. Go to the Updates section and select “Check now.”
4. Wait till the process completes and restart your computer.
5. Again, open the Windows Defender and check for updates.
6. Restart your computer one final time to complete the changes.
Install the update manually by visiting the Microsoft Update Catalog
You can manually download the update directly from Microsoft Store. If you don’t want to install it automatically, just follow the steps below.
1. Open the Settings app.
2. Click Download and Install Updates.
3. Scroll down to find the Windows 10 Redstone 5 build 17763.
4. Select the option to “Download and Install.”
5. Wait for the installation process to complete.
6. Restart your PC.
Change the name of the SoftwareDistribution folder
If you are having trouble updating Windows 10, it might be because there is a conflict with the software distribution folder. You can fix this problem by renaming the SoftwareDistribution folder. If you want to do it manually, follow the steps below.
1. Press Windows key+X, then choose the Run option. Type cmd into the box and press OK.
2. Open the Command Prompt window. Type the following commands and hit enter after each one:
net stop wuauserv
net stop cryptSvc
net stop bits
net stop msiserver
3. Restart the PC.
Ensure there is no interference from third parties
If you are having trouble installing the latest update, there could be several reasons why. Here are five solutions to try:
1. Disable your anti-virus software. This will allow Windows Update to run normally.
2. Reboot your computer. Sometimes, rebooting helps resolve issues with Windows Updates.
3. Try downloading the update again. You might find that the download worked earlier.
4. Check your connection speed. Slow connections can cause problems during downloads.
5. Run Windows Update manually. Click Start, type MSConfig into the Search box, and press Enter. In the System Configuration window, select Startup Programs. Find the checkbox next to “Windows Update” and uncheck it. Then click OK. Restart your computer to see whether the problem still exists.
Turn off IPv6
The Windows 10 Anniversary update introduced a bug where some users are unable to install security updates due to an error code 0x80246002. This problem occurs because the system cannot determine whether it is running IPv6 or IPv4. There is no way to tell what version of the IP address protocol is being used.
To fix this issue, we recommend that you follow one of the following steps to disable IPv6 temporarily:
1. Open the Start menu and enter “Network & Internet.”
2. Click on the network icon located in the lower-left corner of your screen.
3. Select “Change Adapter Settings.”
4. Right-click on the adapter you want to change and choose Properties.
5. On the Advanced tab, uncheck the box next to Use IPv6 addressing.
APPROVED: To fix Windows errors, click here.
Frequently Asked Questions
How to resolve error 0x80246002?
Error 0x80246002 is almost exclusively caused by definition updates in Windows Defender, the built-in antivirus, and the protection program in Windows 10. Fortunately, you can solve this problem by simply updating Windows Defender definitions in Windows Defender itself.
How do I run an update troubleshooter?
To run a troubleshooting update, follow these steps: Choose Start -> Settings -> Update and Security -> Troubleshooting, or select the Troubleshooting link at the end of this topic. Select the troubleshooting you want to perform, and then select Run Troubleshooting.
How do I fix the fact that Windows Update won’t download?
- Wait or reboot your computer.
- Free up disk space.
- Turn off all non-Microsoft programs.
- Temporarily disable the firewall.
- Run Windows Update troubleshooting.
- Restart the Windows Update service.
- Run the antivirus software.