- Download and install the software.
- It will scan your computer for problems.
- The tool will then fix the issues that were found.
There are some common issues you may run into when using Google Chrome, including the “ERR_CACHE_MISS” error message. If you’ve encountered this message, the browser has also asked you to re-enter some info. While this error can sometimes be confusing and frustrating, there’s nothing wrong with it. It’s just something we need to get right.
Table of Contents:
What is the meaning of the ‘err_cache_miss’ issue?

This error usually happens because of the absence of specific cache files. These files help speed up web browsing and improve performance. When there are no such files, the browser displays the following error: “The requested URL could not be retrieved.”
A user may encounter this error while filling out a form on a website. To fix this problem, make sure that the form submission is complete. If the form does not contain any errors, try clearing your browser cookies. If none of these methods work, check whether you are running the latest version of your browser. For example, Chrome requires version 56.0.2924.87; Firefox needs version 52.1.0.
Why does Chrome display this ‘ERR_CACHE_MISS’ error?
When you’re trying to load a web page, and it doesn’t show up immediately, there are many reasons why that could happen. Some common causes include:
• Your computer isn’t configured correctly.
• You’re accessing a site that uses HTTPS encryption, but your browser isn’t configured to use TLS/SSL protocols.
• A third-party tool such as a browser add-on or plug-in might be causing errors.
• Your connection speed is slow.
How to get rid of the err_cache_miss error?
Install the latest version of Chrome
This error occurs when Chrome isn’t updated correctly. If you’re experiencing it, here are some steps to resolve the problem.
1. Close the browser completely.
2. Open the settings again and check whether there’s anything suspicious in the history section.
3. Restart the computer.
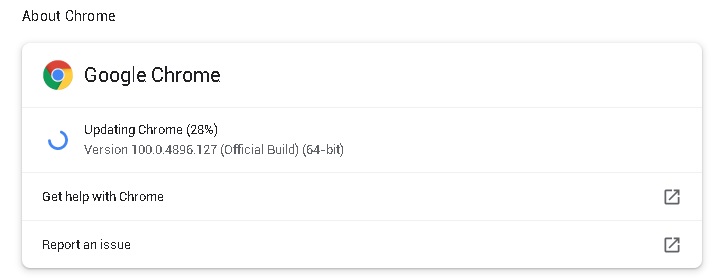
4. Check whether Chrome is up to date. You can do this by opening the “About Google Chrome” window.
5. Try updating Chrome manually.
6. Reset Chrome.
7. Reinstall Chrome.
8. Delete Chrome data.
9. Start over.
10. Make sure you’ve got enough storage space.
11. Clear out temporary files.
12. Download Chrome again.
13. Install Chrome.
14. Enjoy your new version of Chrome.
Updated: April 2025
This tool is highly recommended to help you fix your error. Plus, this tool offers protection against file loss, malware, and hardware failures, and optimizes your device for maximum performance. If you already have a problem with your computer, this software can help you fix it and prevent other problems from recurring:
- Step 1 : Install the PC Repair and Optimizer Tool. (Windows 10, 8, 7, XP, Vista).
- Step 2 : Click Start Scan to determine what problems you are experiencing with your computer.
- Step 3 : Click Repair Allto resolve all problems.

Reset Network Settings
If you are experiencing problems with your internet connection, resetting the network settings might help. In some cases, it could even solve the problem. However, this method is not recommended unless there is no other way out. Here’s how it works…
1. Log into your modem/router via the web browser.
2. Click “Advanced Setup.”
3. Scroll down to “Network Settings” and select “Reset All Settings.”
4. Press “OK.”
5. Wait for the process to complete.
6. Restart your computer.
7. Check whether the problem still exists.
Make sure your DNS settings are correct
If you are trying to access a site that is being blocked, it could be because your Internet Service Provider (ISP) is blocking specific domains. If you don’t know how to change your DNS settings, here is what you need to do:
1. Open up your web browser.
2. Type “about:” into the address bar. This opens up your browser’s information window.
3. Click on the tab labeled “Connection.”
4. Look for the section titled “DNS servers.”
5. Find your current DNS server listed there.
6. Replace it with one of the following options:
Reset Your Browser Settings
There are several ways to fix this. One of the easiest is to just reset everything back to default. This way, you’ll start over without losing anything important like bookmarks or passwords.
To do this, follow these steps:
1. Open up Chrome.
2. Click on the three dots icon in the upper left corner.
3. Select “More tools.”
4. Scroll down to “Reset settings.”
5. Click on the “Reset” button.
6. Wait for the process to finish.
7. Restart your computer if prompted.
Your browser’s data should be cleared
Clear browsing data clears cached information such as cookies, history, and temporary internet files. This includes both local and third-party caches. If you don’t clear out your browser data, it could cause issues with loading webpages.
Cache files store static data, which speeds up loading times. However, there is no need to worry because the cache doesn’t contain anything sensitive. You can safely delete the cache files without causing problems.
Refresh the browser after clearing the caches. Make sure to refresh the entire tab or window and not just the address bar.
Launch the internet connections troubleshooter utility
A Windows-related solution could help you fix some common issues. If you are having trouble connecting to Wi-Fi networks, accessing shared drives, printing, or browsing the web, try following the steps below. This will run the Windows 10 troubleshooter, which will check your computer for problems related to your internet connection and recommended solutions.
Click on Detect problems and apply the fixes (or Run the troubleshooter). If the problem persists, click on Troubleshoot. The troubleshooter will scan your PC for potential issues and provide suggested solutions. You can choose whether or not to install each solution.
Get rid of unnecessary Chrome extensions
err_cache_miss error happens when there are too many extensions installed on your browser. This error usually appears when there are too many add-ons running on your computer. If you see this error, it might mean that you’ve got some unwanted extensions installed on your system. You can use the following steps to fix this problem:
1. Click the Trash icon next to each extension you want to delete.
2. Once the extensions are removed, refresh the web page.
3. Repeat step 2 for every extension that you want to remove.
4. Restart your browser once again.
5. Check whether the issue persists or not.
APPROVED: To fix Windows errors, click here.
Frequently Asked Questions
How do I fix the err_cache_miss error?
You can try disabling the caching system when using the developer tool. This may help you bypass or avoid the error. To disable caching, press Ctrl + Shift + I, then F1, and select "Disable caching (when DevTools is open)."
How do I restore Google Chrome?
- Close other tabs, extensions, and apps.
- Restart Google Chrome.
- Reboot your computer.
- Check for malware.
- Open the site in a different browser.
- Resolve network issues and report problems with the website.
- Fix problematic applications (Windows computers only).
- Check if Chrome is already open.
How can I restart Chrome?
Type chrome://restart in the address bar. You'll see that the browser stops and restarts. All previously opened tabs - and any other windows with Google Chrome open - will be restored.