- Download and install the software.
- It will scan your computer for problems.
- The tool will then fix the issues that were found.
Windows 10 is one of Microsoft’s most popular operating systems. It includes features like Cortana, OneDrive, Edge browser, Skype, etc., making it a great choice for both home and office use. However, some users are reporting problems while installing updates. If you’re experiencing issues while downloading and updating windows 10, here are some solutions you can try to solve error 0x800700c1.
Table of Contents:
What are the causes of error 0x800700c1?

- Update installation services failing to start can cause an error message “0x800700c1”. If you face this type of error while updating, make sure that you don’t have any third-party software running in the background. Also, ensure that there aren’t any updates pending.
- Improper shutdown causes an error message similar to ‘0x800700c1’. If you experience this error while shutting down, make sure that no programs are open. Try rebooting the computer again.
- Malware infection can cause an error message ‘0x800700c1’. If this happens, scan your PC for malware. You can use a third-party tool to clean up your PC.
How to troubleshoot error 0x800700c1
Windows update error 0x800700c1 can be caused by various reasons. To fix the issue, follow these steps:
- Restart the system using safe mode.
- Run the Disk Cleanup utility to remove temporary files.
- Use System Restore feature to restore previous settings.
- Reinstall the latest version of Windows Update.
- Reset network adapter or router.
If this doesn’t work, follow the steps below to thoroughly resolve the windows update error 0x800700c1.
Launch the Windows update troubleshooter
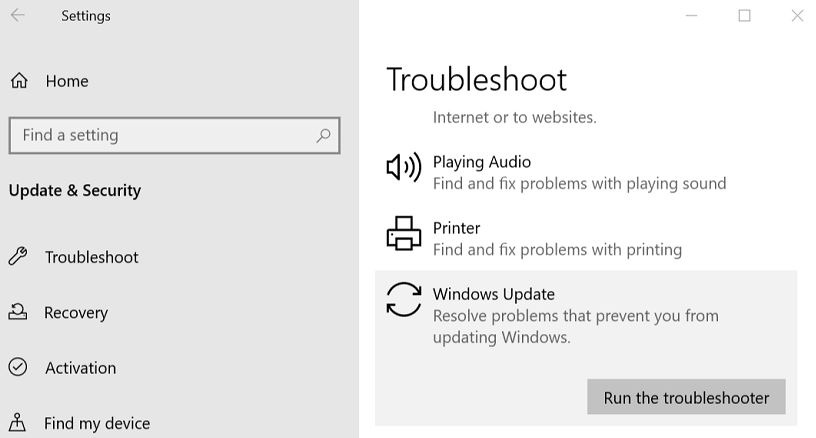
Windows 10 includes automatic updates for security patches and fixes. But sometimes, you might want to run the Windows Update Troubleshoot tool manually. Here are some things to know about it.
What does the Windows Update troubleshooting tool do?
The Windows Update Troubleshooters scan your PC for problems and offers solutions. If there’s something wrong with your PC, like missing drivers, outdated software, or incompatible hardware, the tool helps fix those issues. You don’t have to worry about installing anything; the tool automatically downloads and installs the necessary drivers and software.
How do I use the Windows Update Troubleshopper?
- To start the tool, type “windowsupdate troubleshooter” into the Start menu.
- Click Next, follow the prompts and select the options that best suit your needs.
- When you’re finished, click Finish.
Why do I need to use the Windows Update Trouble Shooter?
If you notice that your computer isn’t working properly, the Windows Update Troubleshot tool can help identify potential causes. For example, if you see errors related to driver installation, you’ll want to install the latest drivers. Or, if you see errors relating to the Windows Installer Service, you’ll want to restart your PC and try again.
Updated: April 2025
This tool is highly recommended to help you fix your error. Plus, this tool offers protection against file loss, malware, and hardware failures, and optimizes your device for maximum performance. If you already have a problem with your computer, this software can help you fix it and prevent other problems from recurring:
- Step 1 : Install the PC Repair and Optimizer Tool. (Windows 10, 8, 7, XP, Vista).
- Step 2 : Click Start Scan to determine what problems you are experiencing with your computer.
- Step 3 : Click Repair Allto resolve all problems.

Perform a system restore
System Restore is one of those things that every Windows user knows about, but few actually use. If you’re like most people, you probably don’t even know what it does. But if you ever find yourself in a situation where your computer won’t boot up properly, or you’ve got some weird error pop up on the screen, you’ll want to try performing a system restore.
In short, system restores allow you to go back to a specific date/time on your PC, which gives you the ability to fix problems without having to reinstall everything. So let’s take a look at how to perform a system restore.
Step One: Choose your date and time
Before we start, make sure you have a good idea of what day/time you’d like to restore to. You can do this by opening “My Computer,” right-clicking on the hard drive you want to restore to, and choosing Properties. Then select the tab labeled “Date Created.” This will show you exactly when the file was created. Now, just pick a date that makes sense to you, and write down the exact time.
Step Two: Create a Backup File
Now that you know when you want to restore it and what time you want to restore it, you’ll need to create a backup file. To do this, open Notepad, and type in the following text:
restorefile c:\restores\backup.wim
This command tells Windows to create a.wim (Windows Imaging Format) file named “backup.wim” in the folder “C:\restores”. The “.wim” extension means that the file is a WIM image, which is basically a compressed version of your entire operating system.
Step Three: Restoring from the Backup File
Once you’ve saved the.wim file, you’ll be able to restore it to any point in time prior to saving the file. In order to do so, simply double-click on the.wim file you just made, and then choose the option to “Restore System Image.” When prompted, choose the location where you would like to save the restored image, and then click OK.
That’s all there is to it! After you complete these steps, you should be able to boot up your PC as normal.
Disable the third-party antivirus & firewall temporarily
You may also want to disable your third-party antivirus software for a bit while you run the troubleshooter. It’s possible that the program has blocked access to the Windows Update service, causing the problem.
- To do this, first launch the Control Panel applet.
- Then, search for “antivirus” and select the entry for your current antivirus program.
- Right-click on the selected entry, and then choose Disable.
- Repeat this process for any other programs you have installed.
If you still experience issues after disabling your antivirus software, you might want to consider uninstalling it completely.
Scan for Malware
If you are having trouble downloading software updates, it could be because your antivirus program is blocking access to Microsoft Update Services. This happens when your antivirus detects suspicious activity while trying to download updates. To resolve the issue, scan your system with a trusted anti-malware tool.
Malicious programs often try to hide in the background, making them difficult to detect. If your PC is infected with such a program, you might see messages like “Windows Update Service Cannot Connect to Server.” You can fix this problem by scanning your computer with a trusted anti-virus program.
Reset Windows update components
If you are having problems updating Windows 10, there could be several reasons why it isn’t working properly. One reason could be that some components of Windows Update aren’t configured correctly. If you’re experiencing frequent reboots, slow system response, or error messages while trying to install updates, try resetting the following components to see if that helps resolve the issue.
- Press the power button on your computer until the screen turns off, then press the power button again to turn on your computer.
- Open the Action Center, and then click Change settings.
- Then, under Windows Update, click Advanced options.
- Finally, scroll down to the Settings section, and then click Check now.
Repair the system file corruption
System file corruption occurs when Windows fails to write data to disk correctly. This could happen due to many reasons such as virus infection, hardware failure, improper shutdown, power outage, etc. If you are experiencing system file corruption issues, it is recommended that you use the Disk Cleanup utility to clean up temporary files and free space. In addition, you can run the ScanDisk command to check whether there are any damaged sectors on your hard drive. Finally, you can use the SFC tool to repair corrupted system files.
Utilize the ‘Reset this PC’ feature
A system reset will clear out all of your files and settings, including browser favorites, passwords, and history. It will also restore Windows to factory defaults. If you are having problems with your computer, it could be because of corrupt settings or programs that aren’t working properly. Resetting your PC will help you start over without losing anything.
To perform a system reset, follow these steps:
- Restart your computer.
- When the BIOS screen appears, press F12.
- Select “System Setup.”
- Press Enter.
- Choose “Advanced Boot Options,” then select “Command Prompt.”
- Type “bootrec /fixmbr” (without quotes) and press Enter.
- Wait for the process to complete.
- Reboot your computer.
APPROVED: To fix Windows errors, click here.
Frequently Asked Questions
Why does error 0x800700c1 occur?
The error 0x800700c1 is one of the most common error messages you'll see while trying to install Windows Updates. This error code usually appears because there is something wrong with the network connection, corrupted system file(s), or improper shutdown. However, it could also indicate that the installation process failed due to improperly installed software or updates, improper shutdown, or improper installation of updates.
How to repair the error 0x800700c1?
If you are getting an error code like "0x800700c1", it can mean one of two things - either Windows Update isn't working properly, or there is something wrong with your computer. You might want to try some troubleshooting steps to fix the problem. Here we'll show you how to resolve the error 0x800700C1.
- Make sure to save everything you're working on before rebooting.
- Right-click on the Windows Update Service and select Start.
- Now, go ahead and start Windows Update again.
- After that, close the window and restart your computer once again.
What causes a windows update error?
Error codes are used by Windows to communicate errors and other information about the operating system. These error codes are typically displayed in the Event Viewer log. When you receive an error code like 0x800700c1, it means that the Windows Installer service has stopped working. There may be several possible reasons why this happens. Some of them include:
- Windows Update is not running.
- There's no Internet connection available.
- You have too many pending updates.
- Your computer is infected with malware.
- Your antivirus program is blocking the installation of updates.